Access control
This is where you'll see and manage the permissions and roles of your instance.
What are permissions and roles?
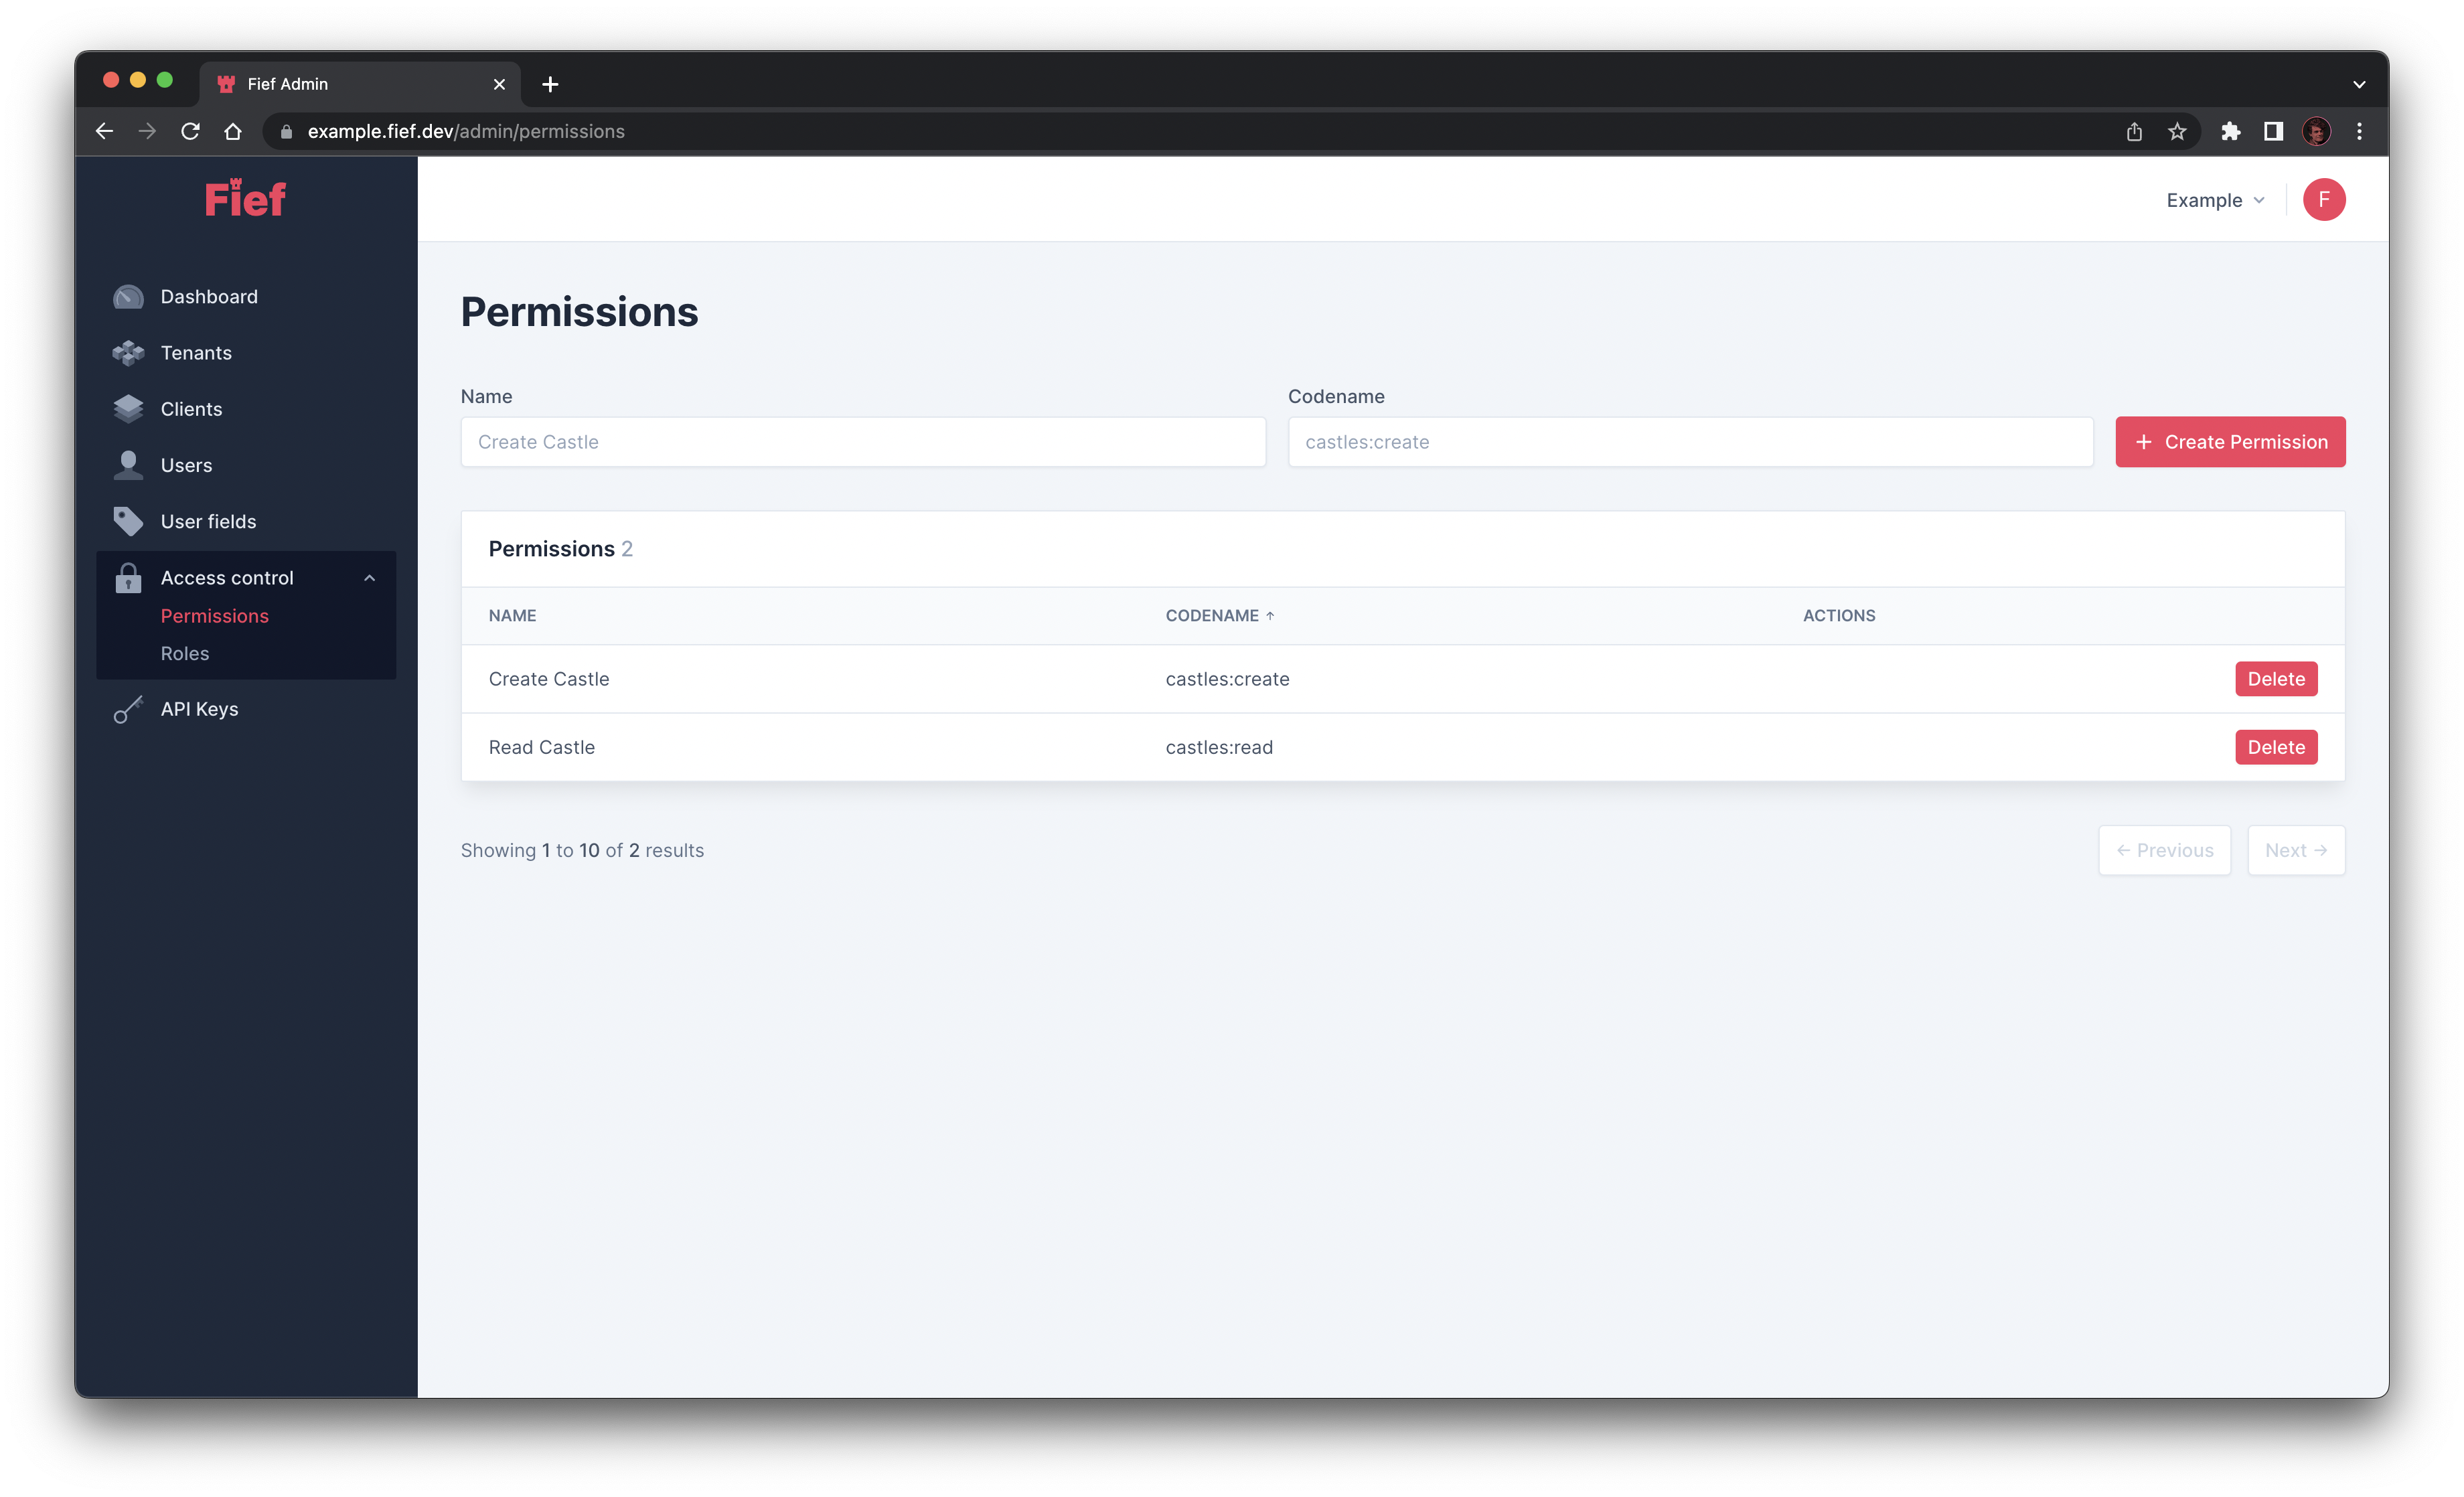
Permissions are a way to list the actions a user will be allowed to perform in your application. For example, if you have a resource in your application called Castle, we can define the permissions Read Castle and Create Castle.
Then, those permissions can be assigned to users. You'll then be able to control this list of permissions in your app to determine if the current user is able to perform the action they request.
Assigning permissions directly to users can be tedious and error-prone. To help with this, Fief also supports the concept of Roles. A role consists of a set of permissions. Following our previous example, we can imagine to have the roles Castle Visitor, which only have the Read Castle permission and a Castle Manager role, which have both Read Castle and Create Castle permissions.
Those roles can also be assigned to users. Then, they'll be automatically granted with the set of associated permissions. The good thing is that if you modify a role to add or remove permissions, it'll be automatically be passed on every users with this role. Said another way, it's a way to easily organize and assign permissions.
Permissions
The first item in the menu is the permissions page, showing you a list of all your permissions.
Create a new permission
To create a new permission, fill the fields above the list: the name and the codename of your permission. The codename is what will be used to identify your permission in the access tokens. It must be unique across your instance.
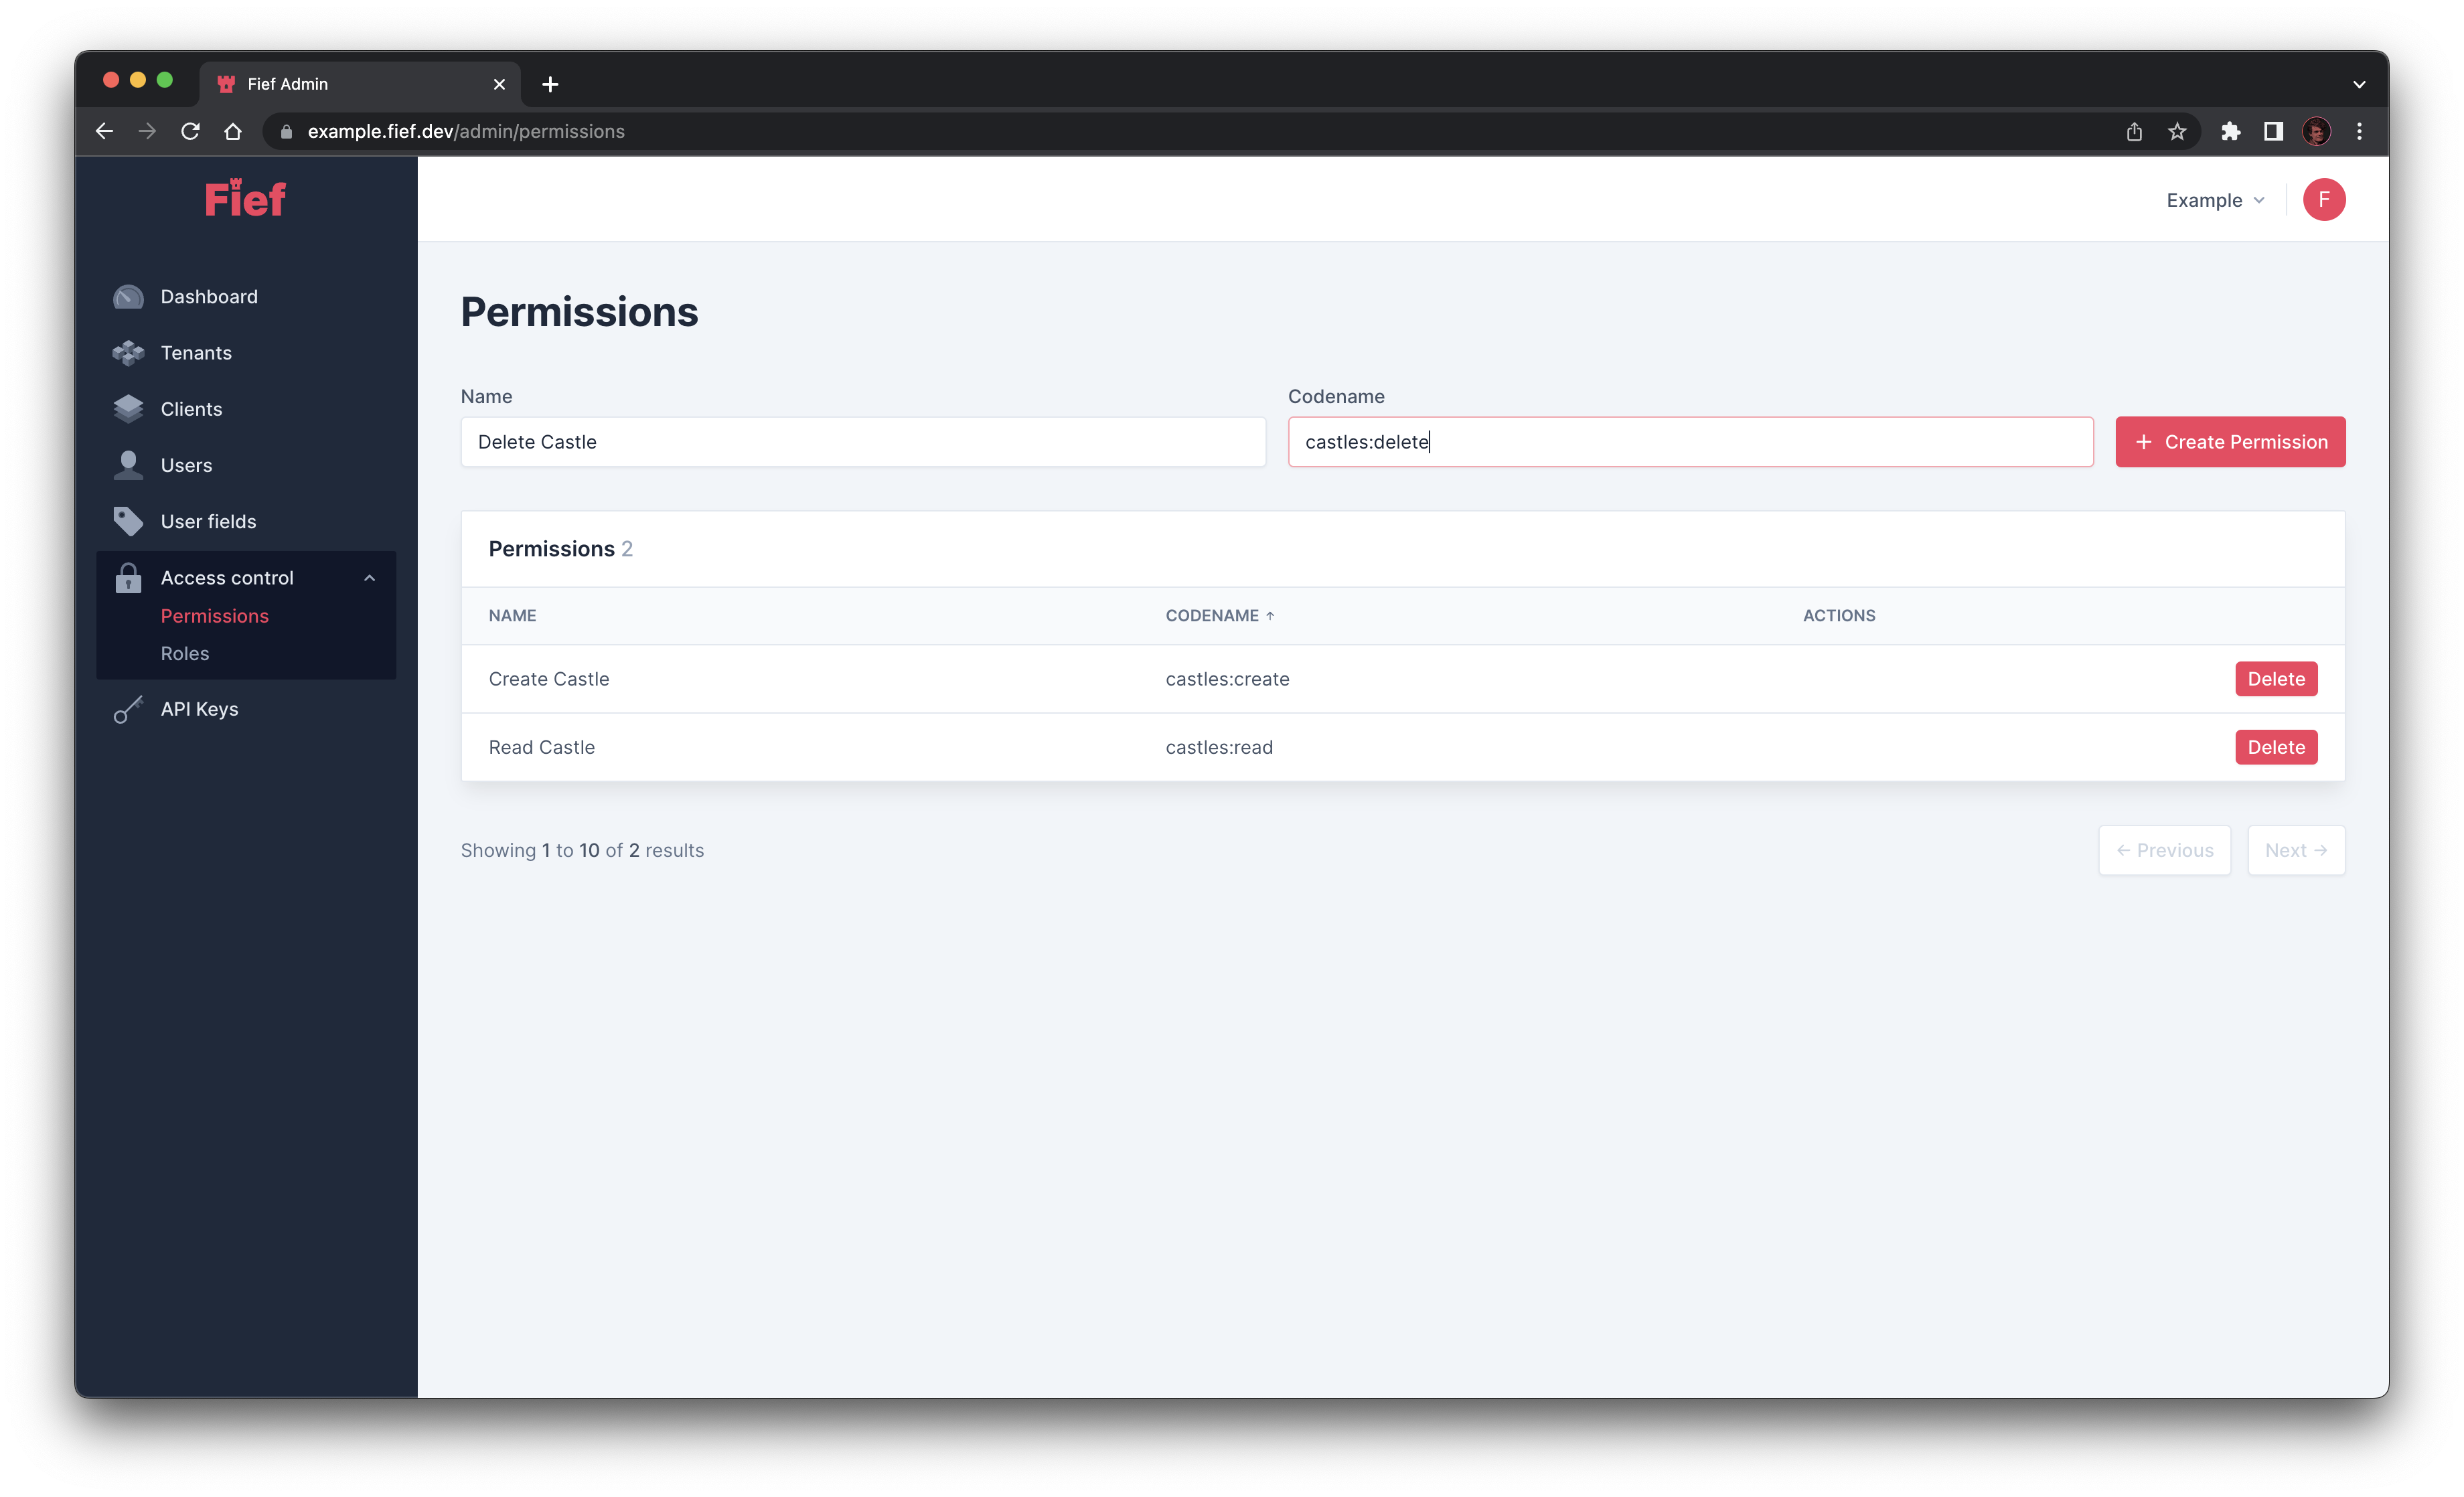
Submit the form by clicking on Create Permission. The newly created permission will appear in the list.
Naming your permissions
You are completely free to choose the name and codenames you wish for your permissions. However, we suggest you to establish a convention so it'll be easy for you and your teams to remember them.
Typically, you'll have a common set of actions (read, create, update, delete...) for each resources (Post, Product, Meeting...) in your app. A common practice is to prefix the codename with the name of the resource and append the corresponding action: post:read, post:create, post:update...
Delete a permission
If one of your permission is not useful anymore, you can delete it by clicking on the Delete button in the list.
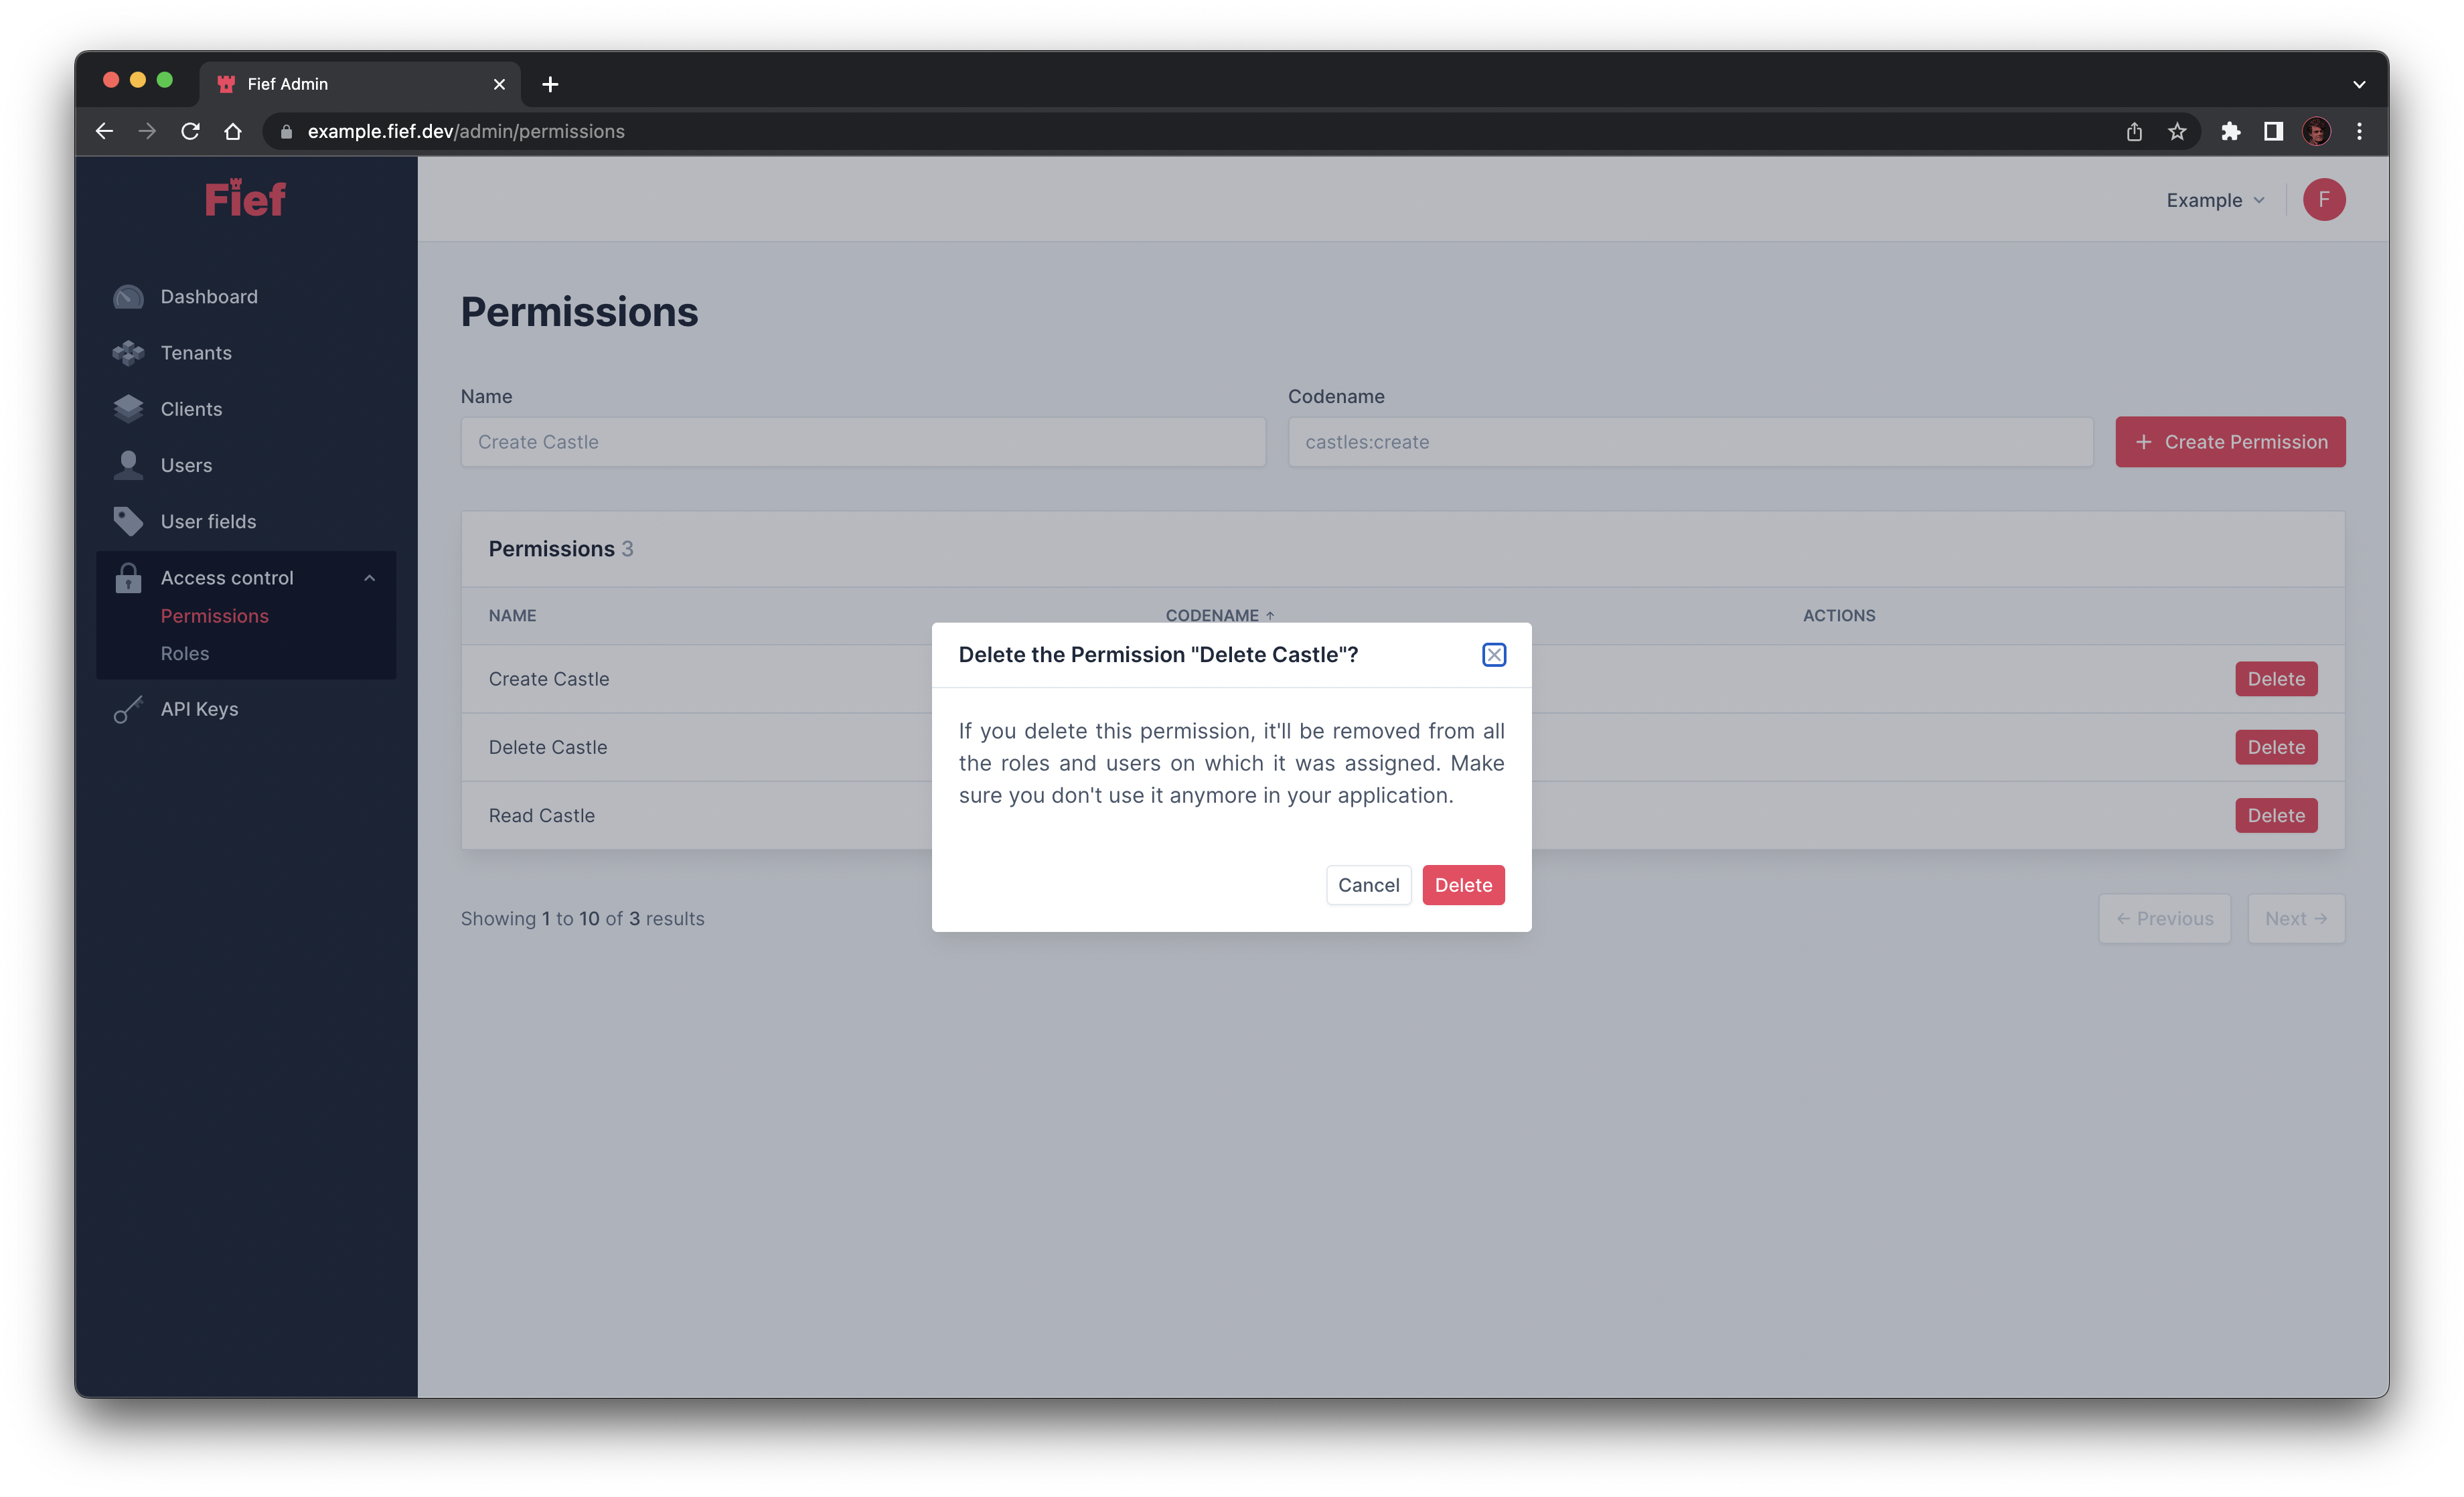
The permission will be removed from all the associated roles and users
When you delete a permission, it'll be removed from all the roles associated to this permission and all the users who were granted this permission. Before deleting it, make sure you don't need it anymore in your application.
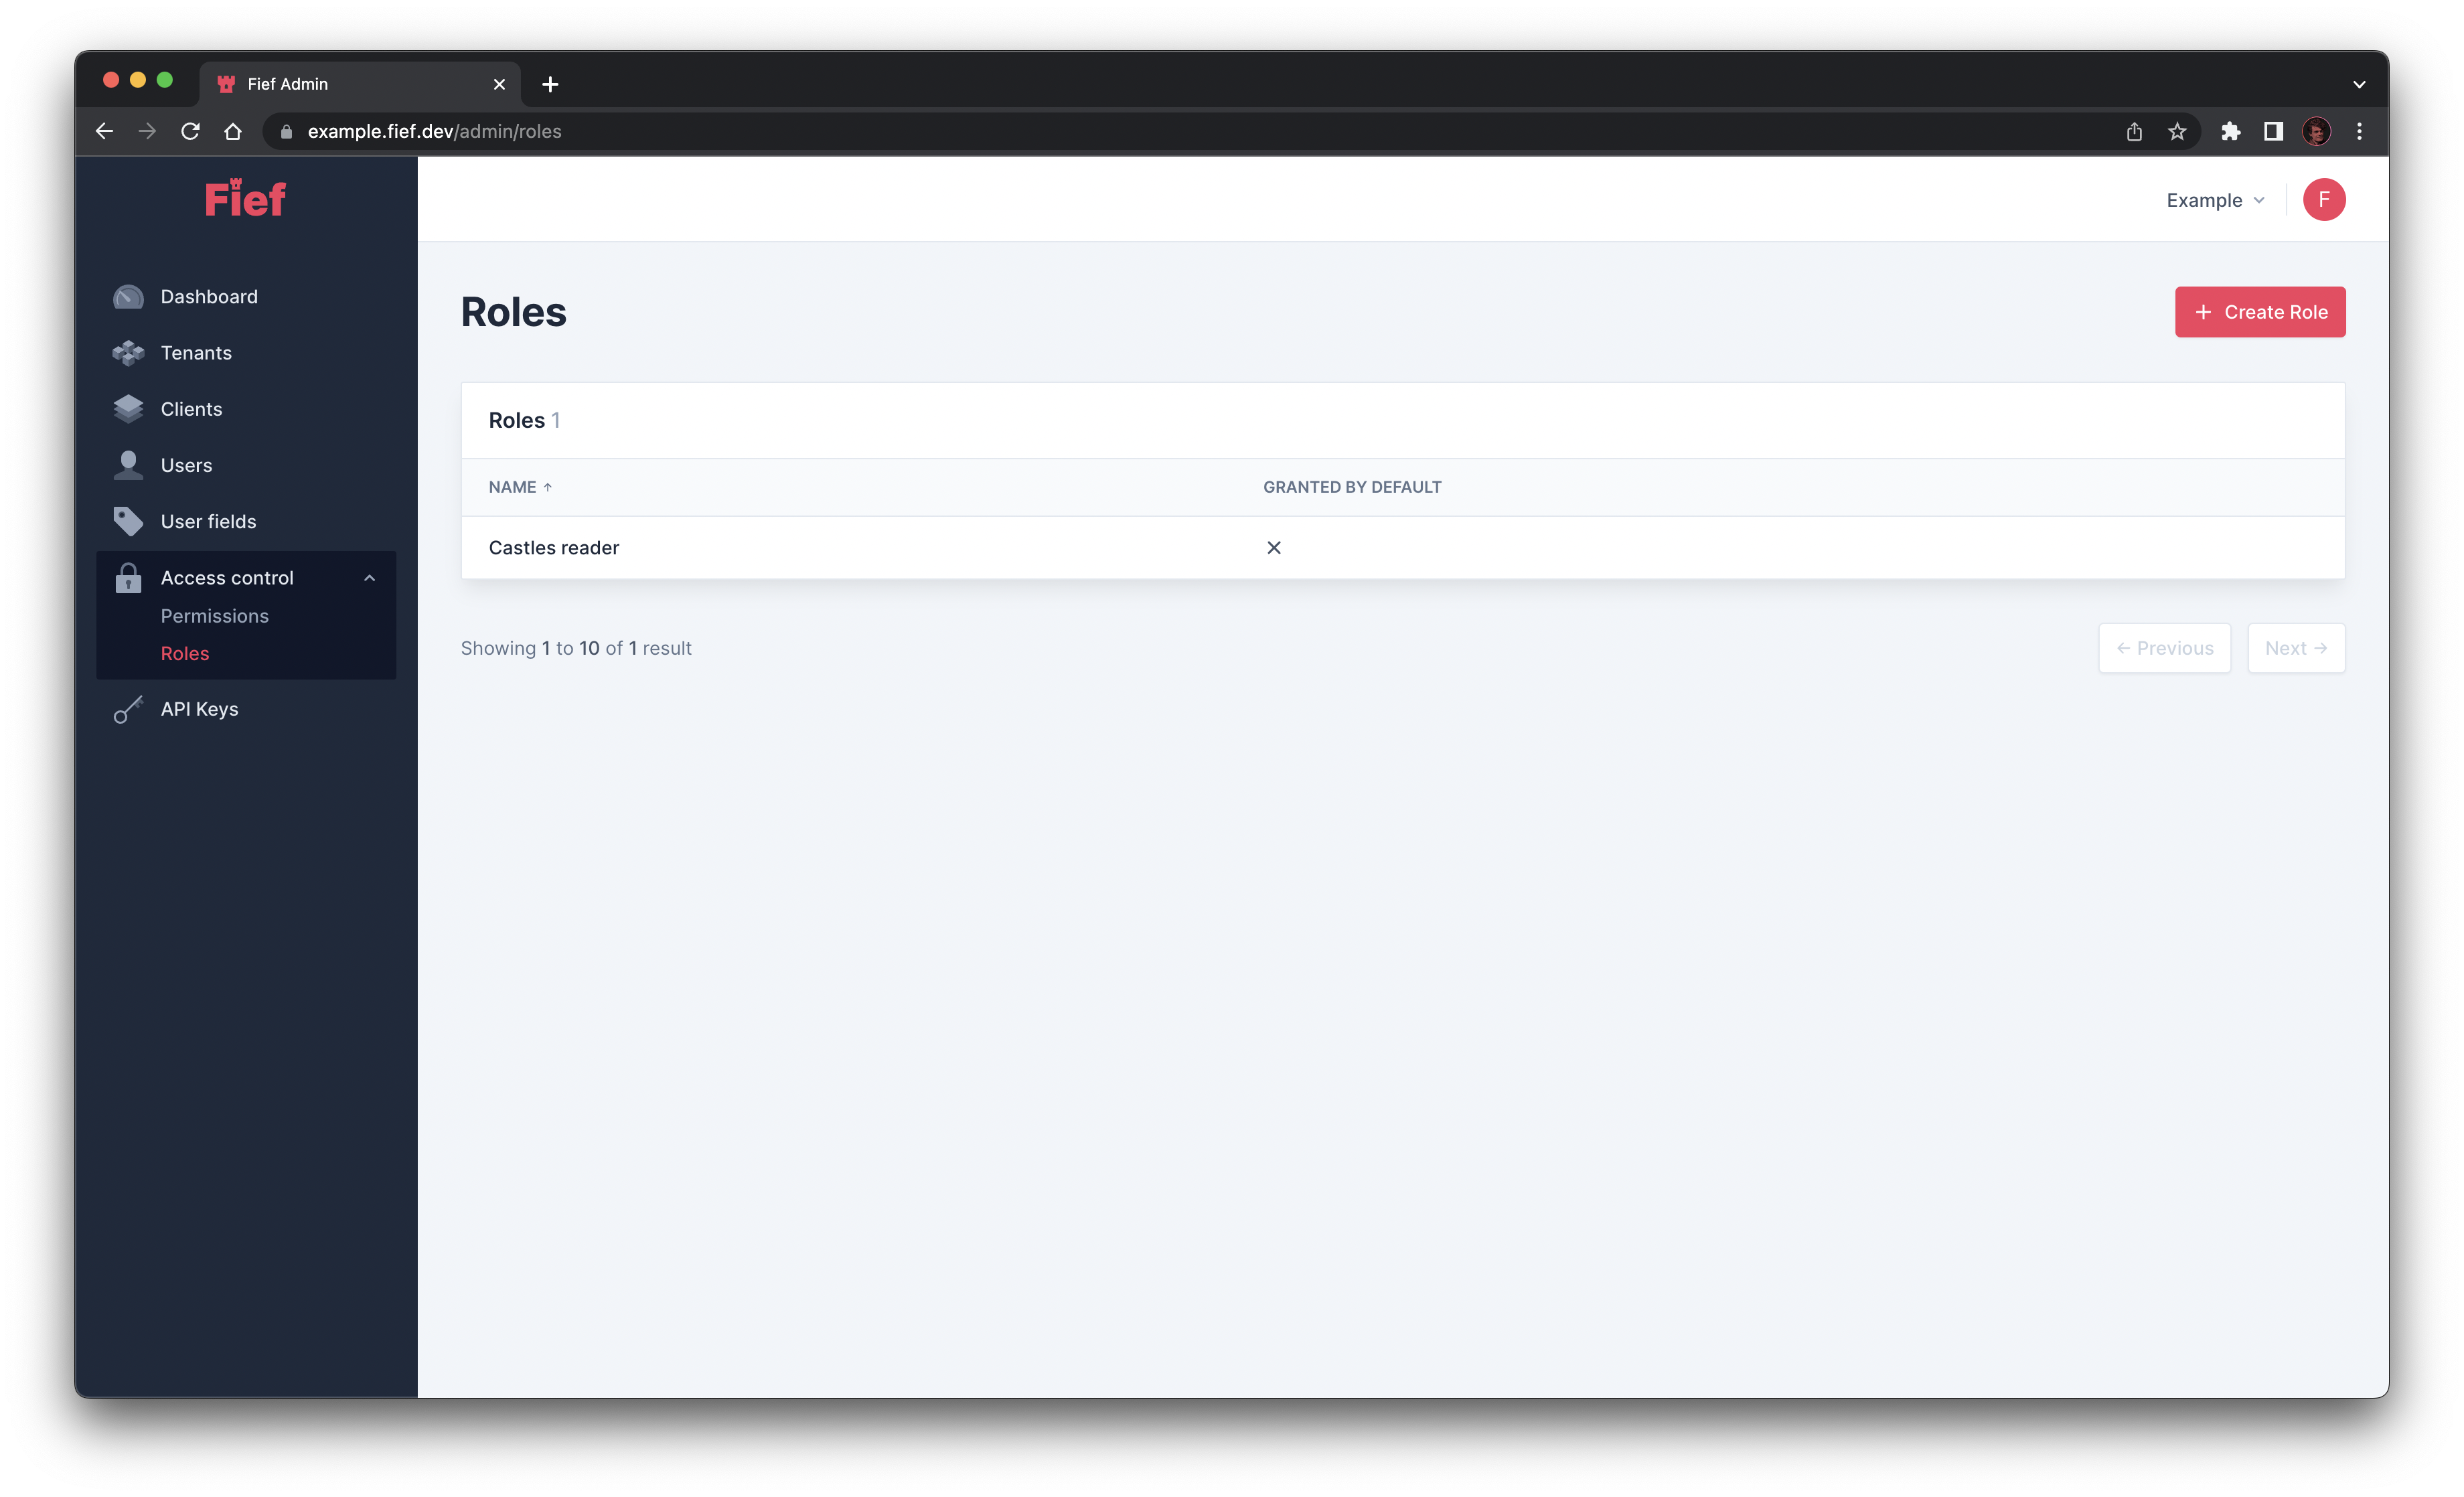
Roles
The second item in the menu is the roles page, showing you a list of all your roles.
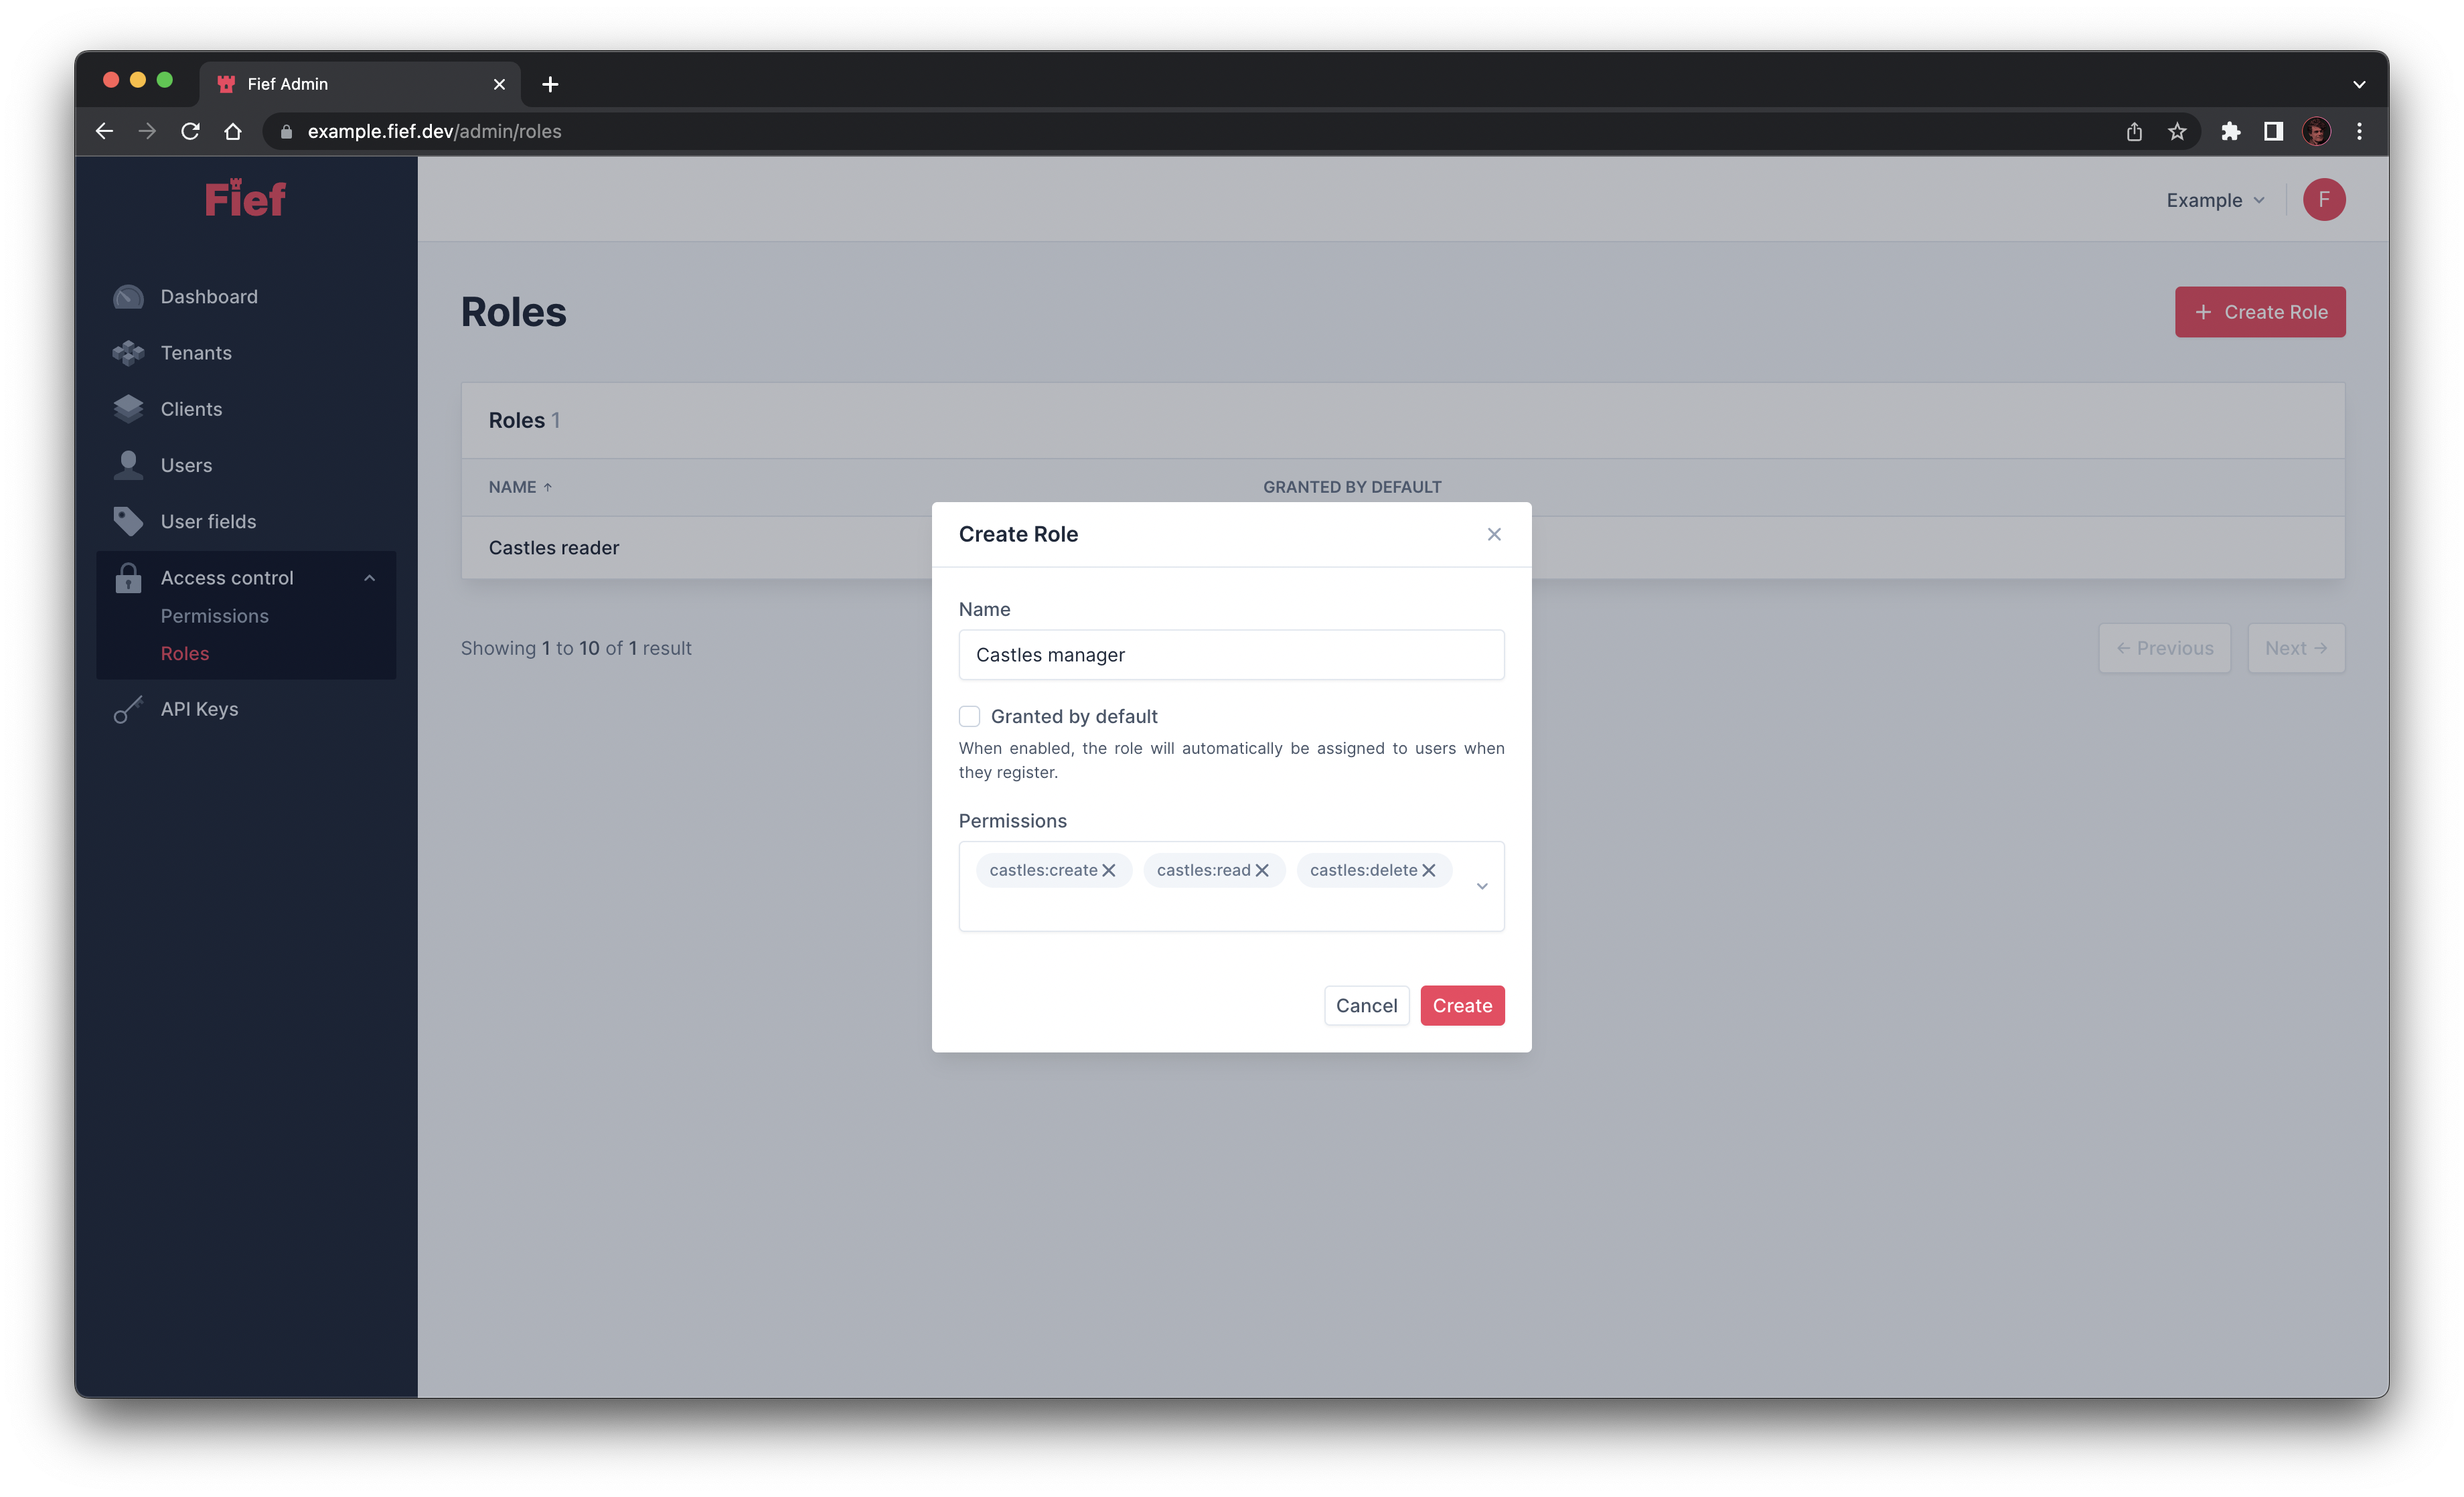
Create a new role
You can create a new role by clicking the Create Role button. A modal will open where you'll be able to input its name, if it's granted by default and its list of associated permissions.
Edit an existing role
If you click on one of the role in the list, you'll see its details on the right. You'll be able to edit its name, granted by default option and associated permissions.
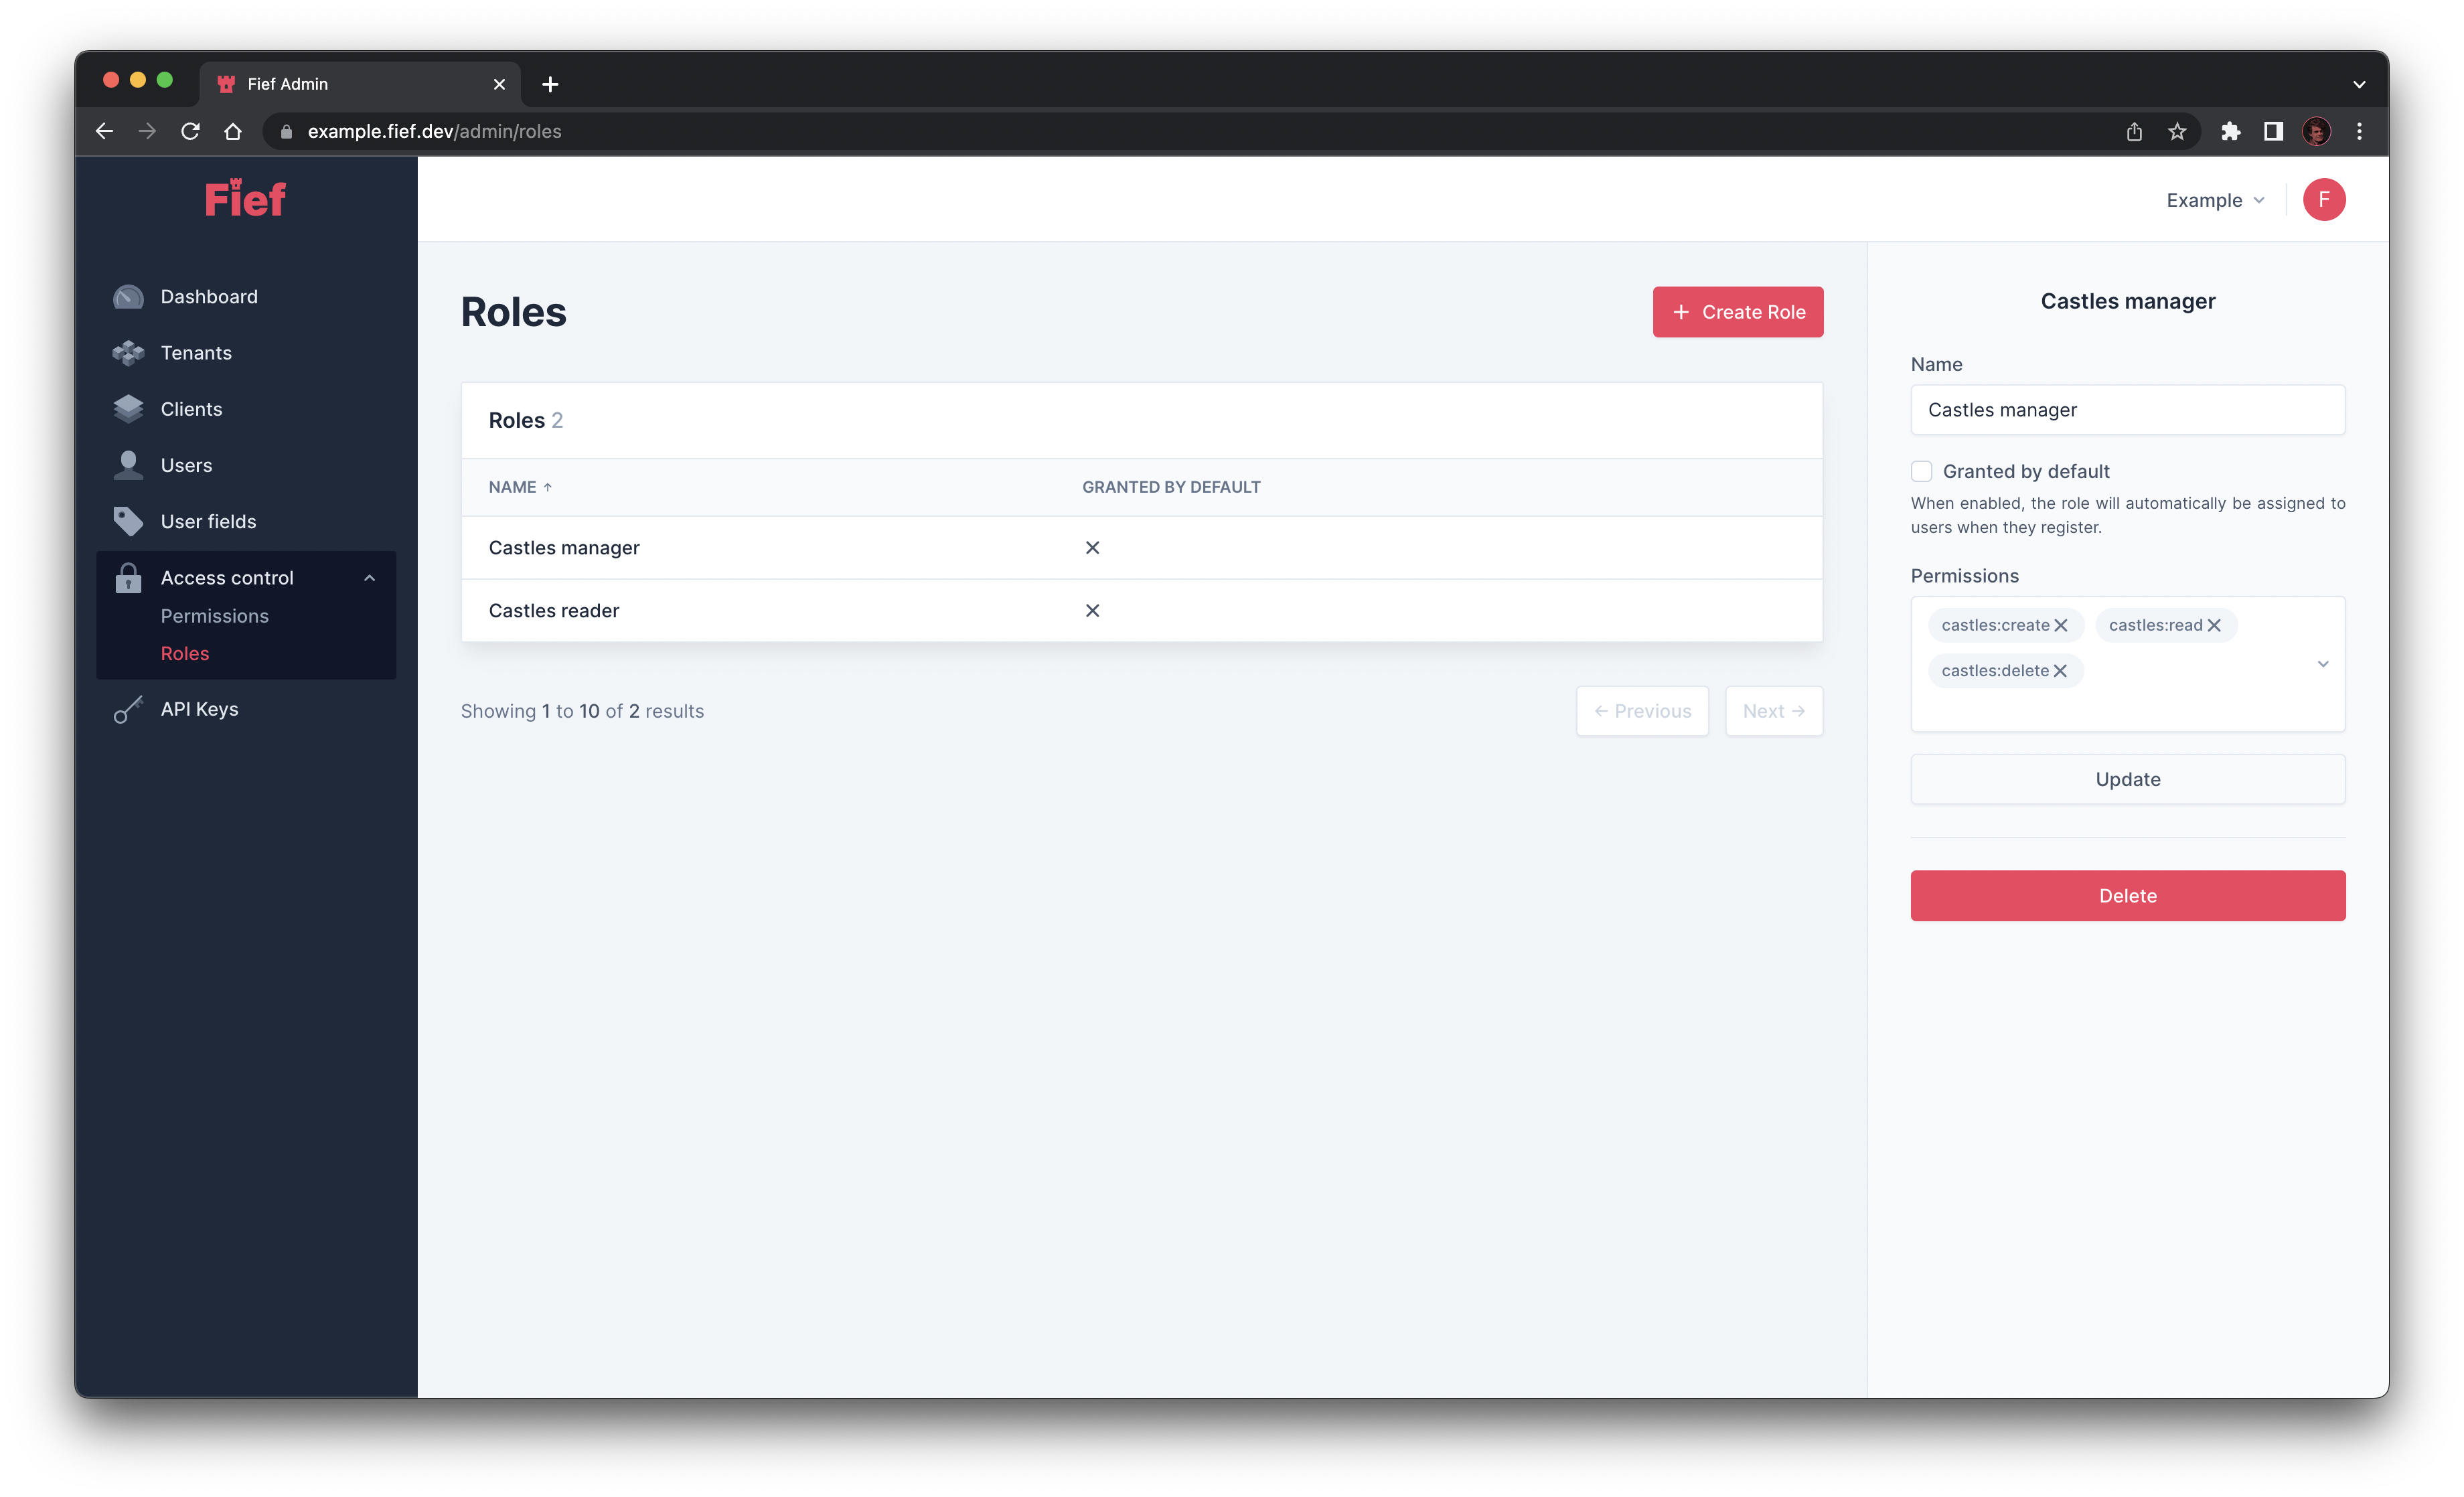
Permissions are automatically propagated to users with this role
If you add or remove a permission from a role, the permissions of the users having this role will also be updated accordingly.
Delete a role
If one of your role is not useful anymore, you can delete it by clicking on it on the list and click on the Delete button on the right.
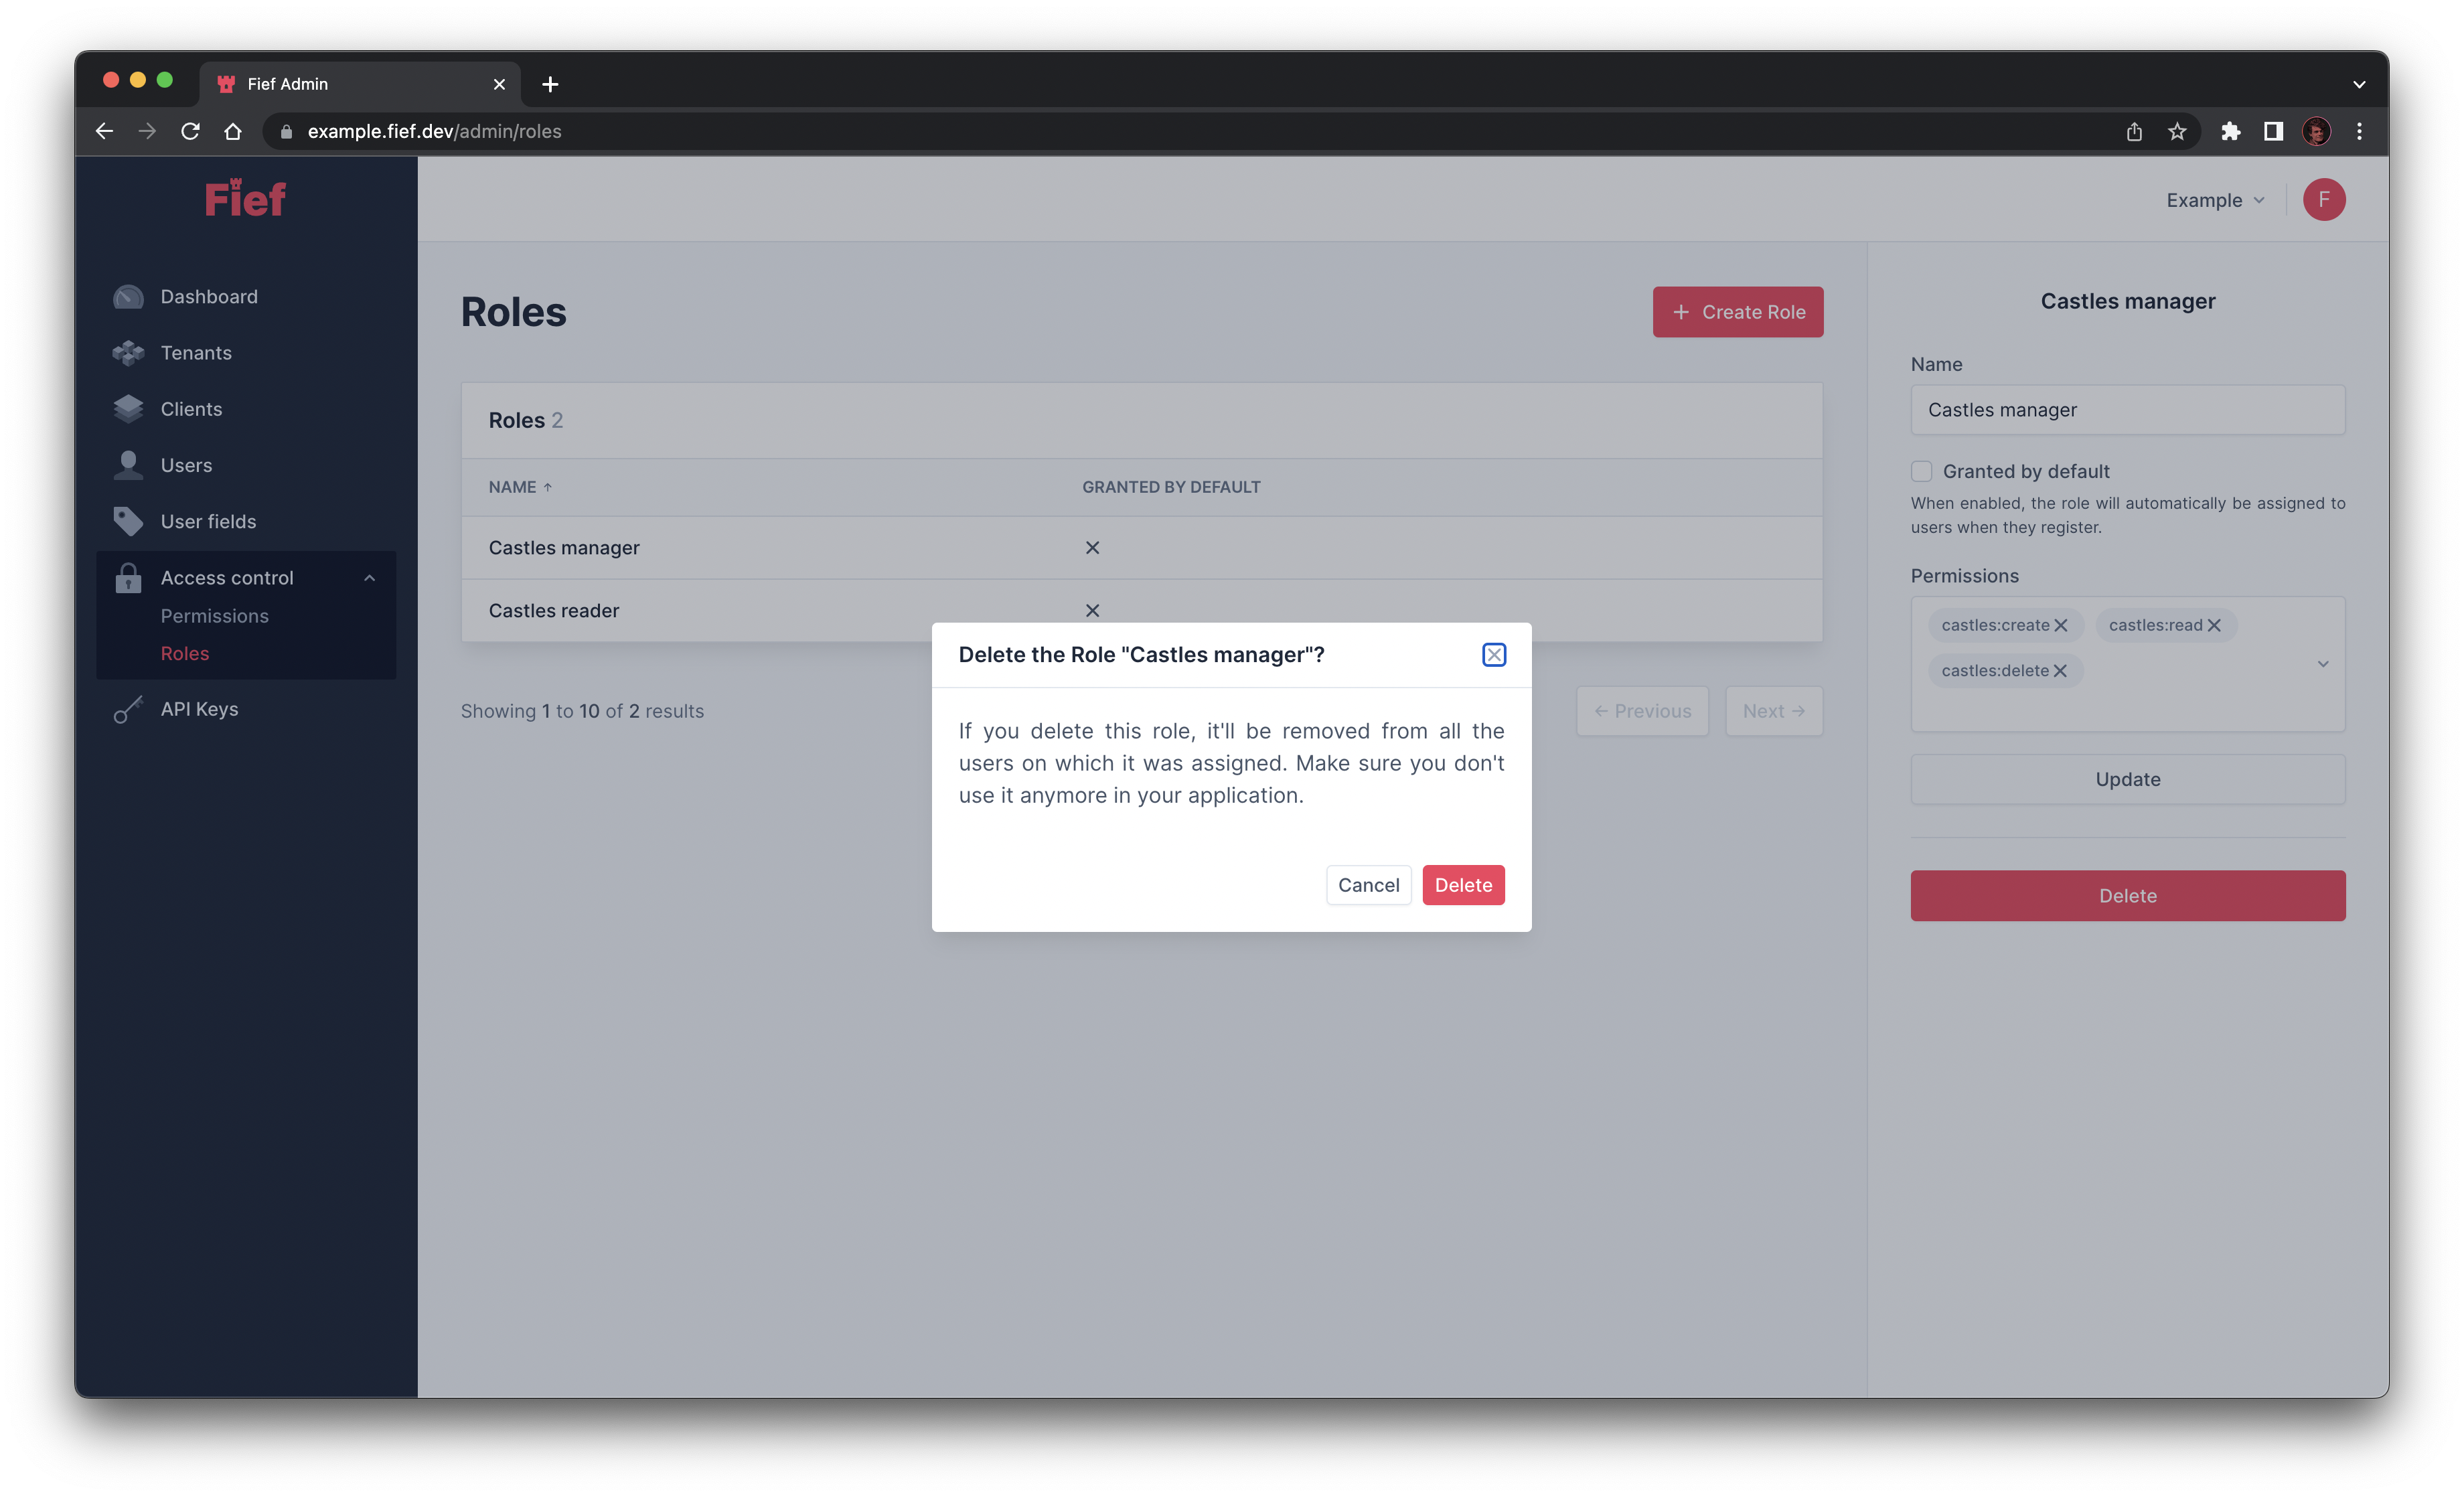
The role will be removed from all the associated users
When you delete a role, it'll be removed from all the users who were granted this role. Before deleting it, make sure you don't need it anymore in your application.
Granted by default
When you mark a role as Granted by default, it'll be automatically assigned to new users upon their registration. It's especially useful if you need your users to be able to perform basic actions directly on signup.