FastAPI
FastAPI is one of the fastest-growing Python web framework. It features impressive performance and top-notch developer experience. Actually, the Fief server itself is implemented with FastAPI!
The Fief Python client provides tools to help you integrate Fief authentication in your FastAPI project. Let's see how to use them!
Install the client
Install the Fief client with the optional FastAPI dependencies:
API example
This is for you if...
- Your FastAPI backend will work as a pure REST API.
- You have a separate frontend, like a JavaScript or mobile app, that'll take care of the OAuth2 flow.
Prerequisites
- Check that the following Redirect URI is allowed on your Fief Client:
http://localhost:8000/docs/oauth2-redirect
In this first example, we'll leverage the interactive documentation generated by FastAPI to perform the OAuth2 authentication. The goal here is just to show you how to protect your API route with a Fief access token.
from fastapi import Depends, FastAPI
from fastapi.security import OAuth2AuthorizationCodeBearer
from fief_client import FiefAccessTokenInfo, FiefAsync
from fief_client.integrations.fastapi import FiefAuth

fief = FiefAsync(  # (1)!
    "https://fief.mydomain.com",
    "YOUR_CLIENT_ID",
    "YOUR_CLIENT_SECRET",
)

scheme = OAuth2AuthorizationCodeBearer(  # (2)!
    "https://fief.mydomain.com/authorize",  # (3)!
    "https://fief.mydomain.com/api/token",  # (4)!
    scopes={"openid": "openid", "offline_access": "offline_access"},
    auto_error=False,  # (5)!
)

auth = FiefAuth(fief, scheme)  # (6)!

app = FastAPI()


@app.get("/user")
async def get_user(
    access_token_info: FiefAccessTokenInfo = Depends(auth.authenticated()),  # (7)!
):
    return access_token_info
-
Fief client instantiation
As we showed in the standard Python section, we instantiate here a Fief client here with the base tenant URL and client credentials.
Notice here that we use the
FiefAsyncclass. FastAPI being an ASGI framework, it's always nice to take advantage ofasynciocapabilities. -
OpenAPI security scheme
FastAPI uses those security schemes to generate an interactive documentation showing the right interface to authenticate with the API. We use here a standard OAuth2 interface.
-
Don't forget to replace with your base URL here
This is to tell the interactive documentation where to redirect you upon authorization.
-
Don't forget to replace with your base URL here
This is to tell the interactive documentation where to ask for a fresh token after successful login.
-
We set the auto_error argument to
FalseIt tells FastAPI user to bypass its built-in error response if the token is not present: Fief client provides its own logic to handle this.
-
Fief helper for FastAPI
This is the helper doing the tedious work for you with FastAPI. All it needs is an instance of the Fief client and the scheme.
-
authenticateddependencyThis is where the magic happens: in pure FastAPI style,
FiefAuthgives you aauthenticateddependency to check for the access token and optionally for required scopes.If everything goes well, you'll get a dictionary containing the ID of the user, the list of allowed scopes and the raw access token.
And that's about it!
Test it
You can run this example just like you would do for any FastAPI app:
Open http://localhost:8000/docs to access the interactive documentation.
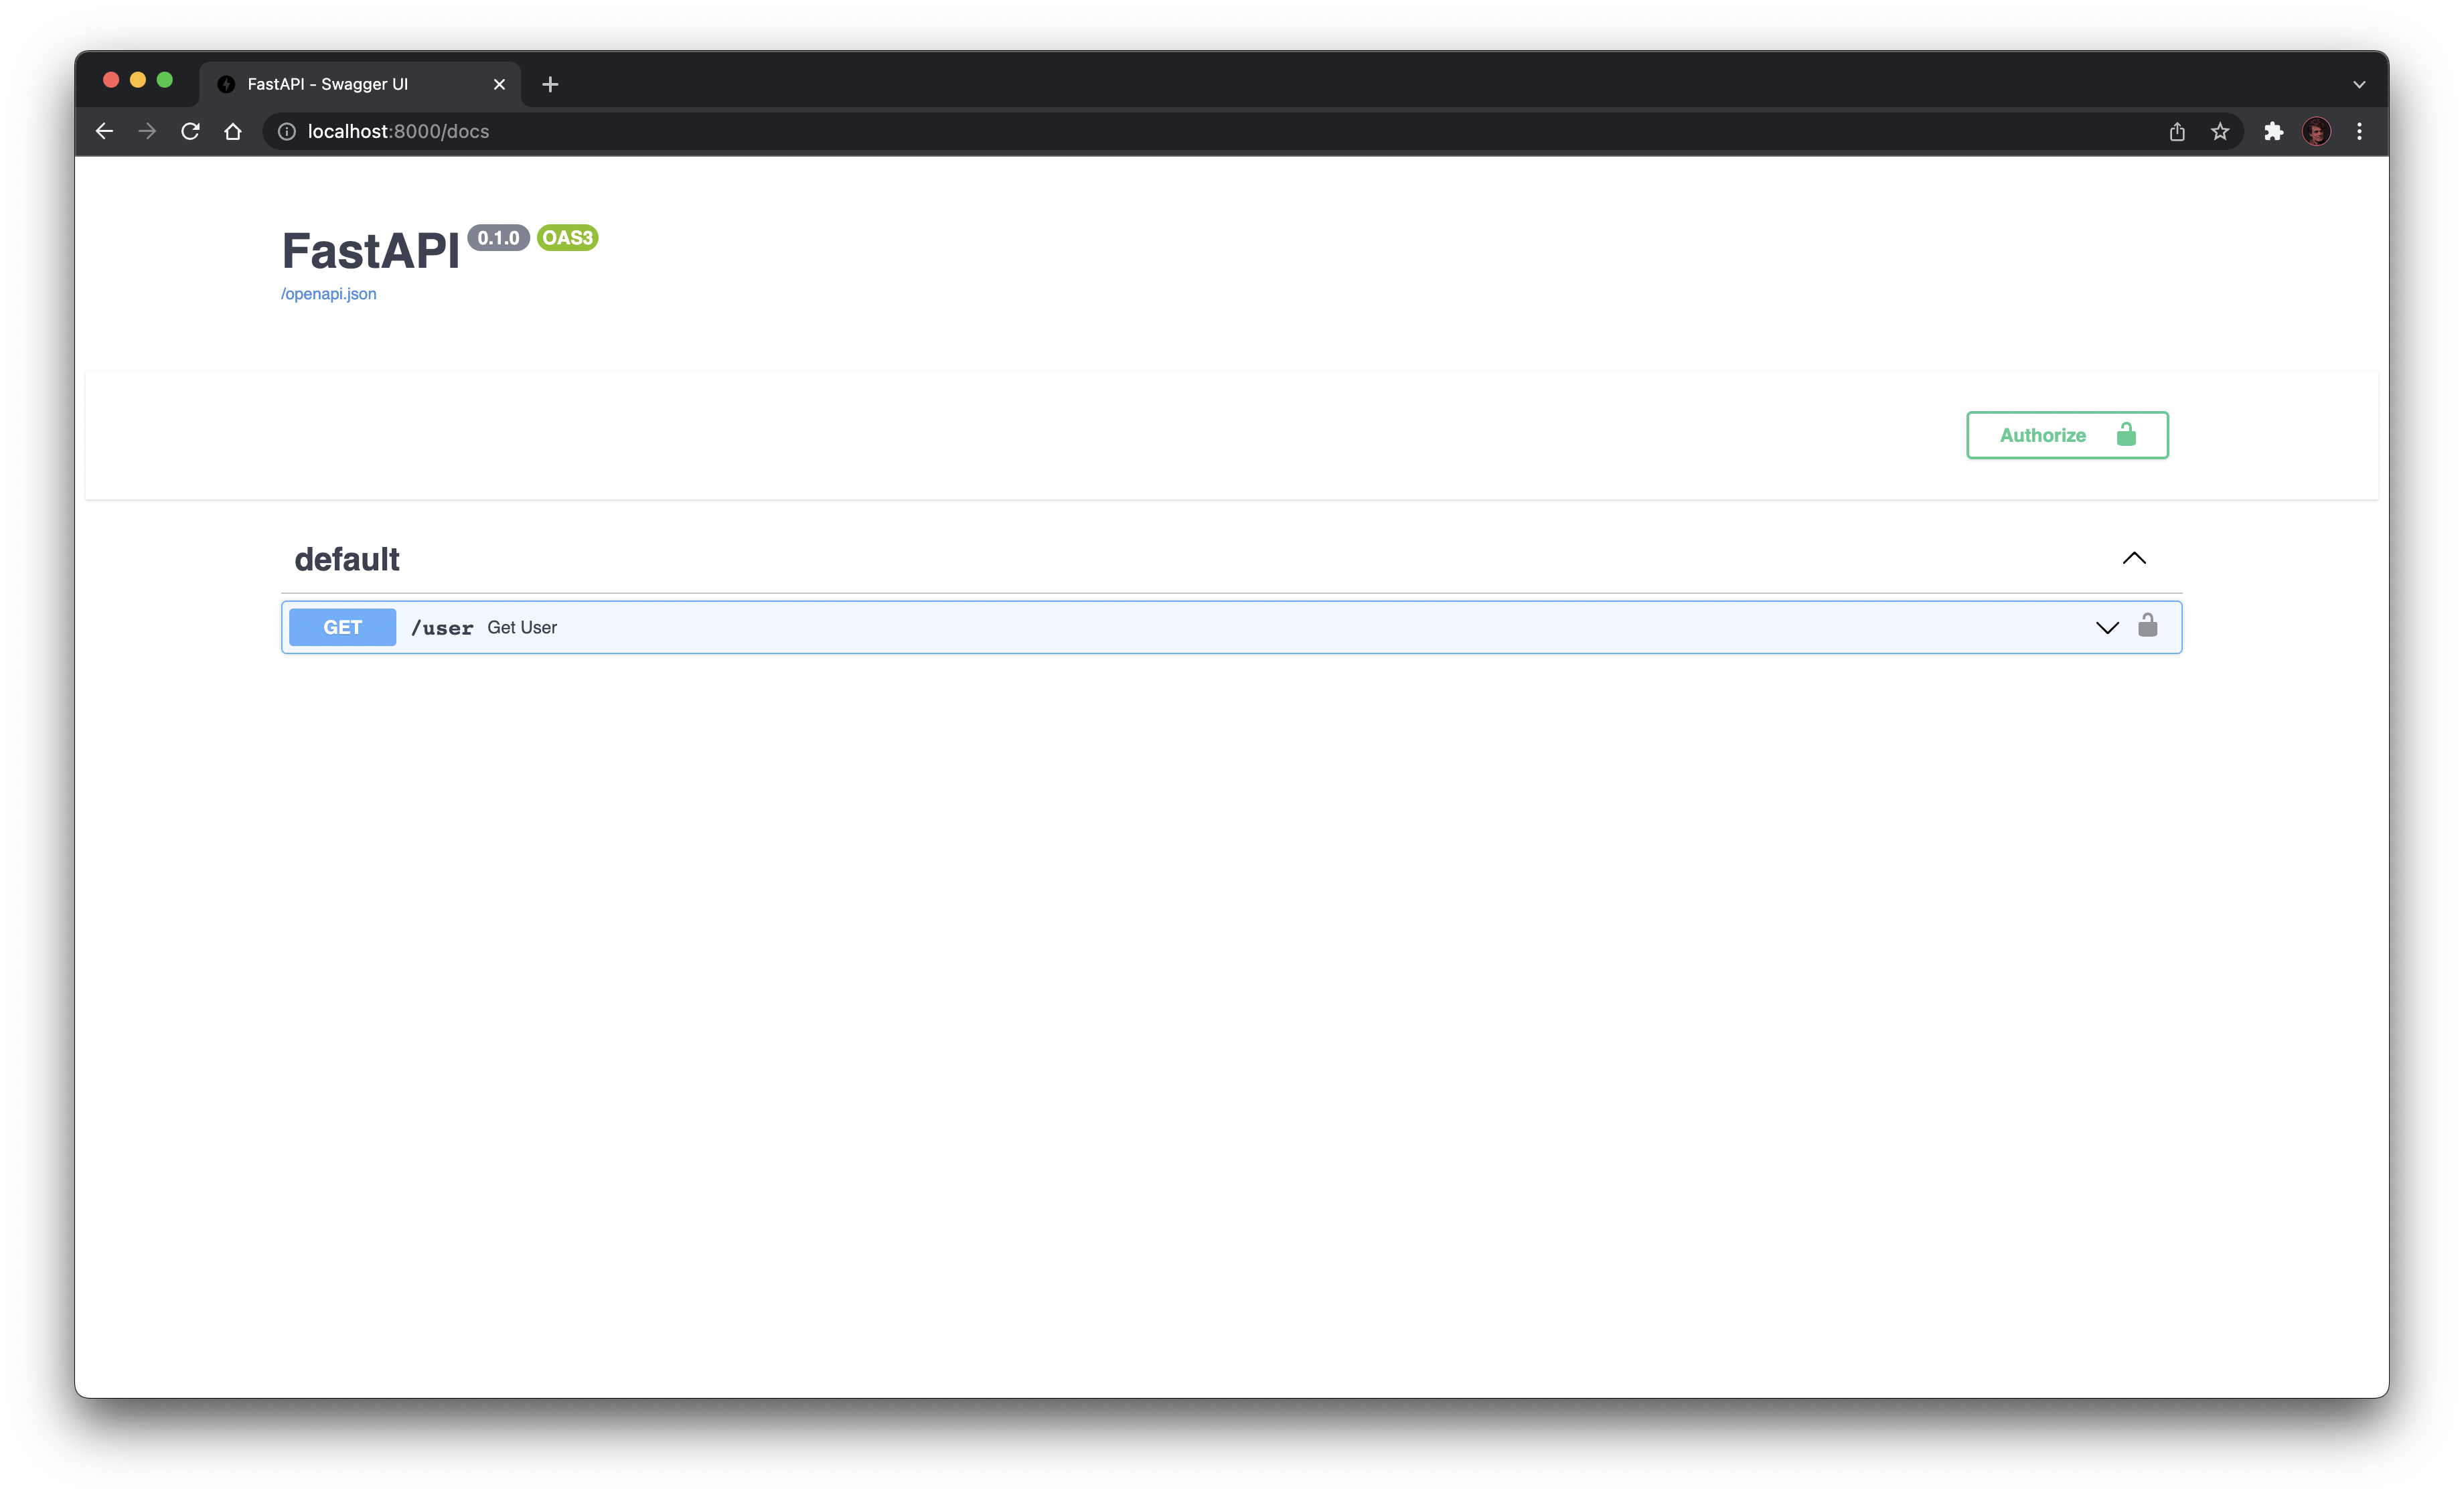
Let's try first the /user endpoint:
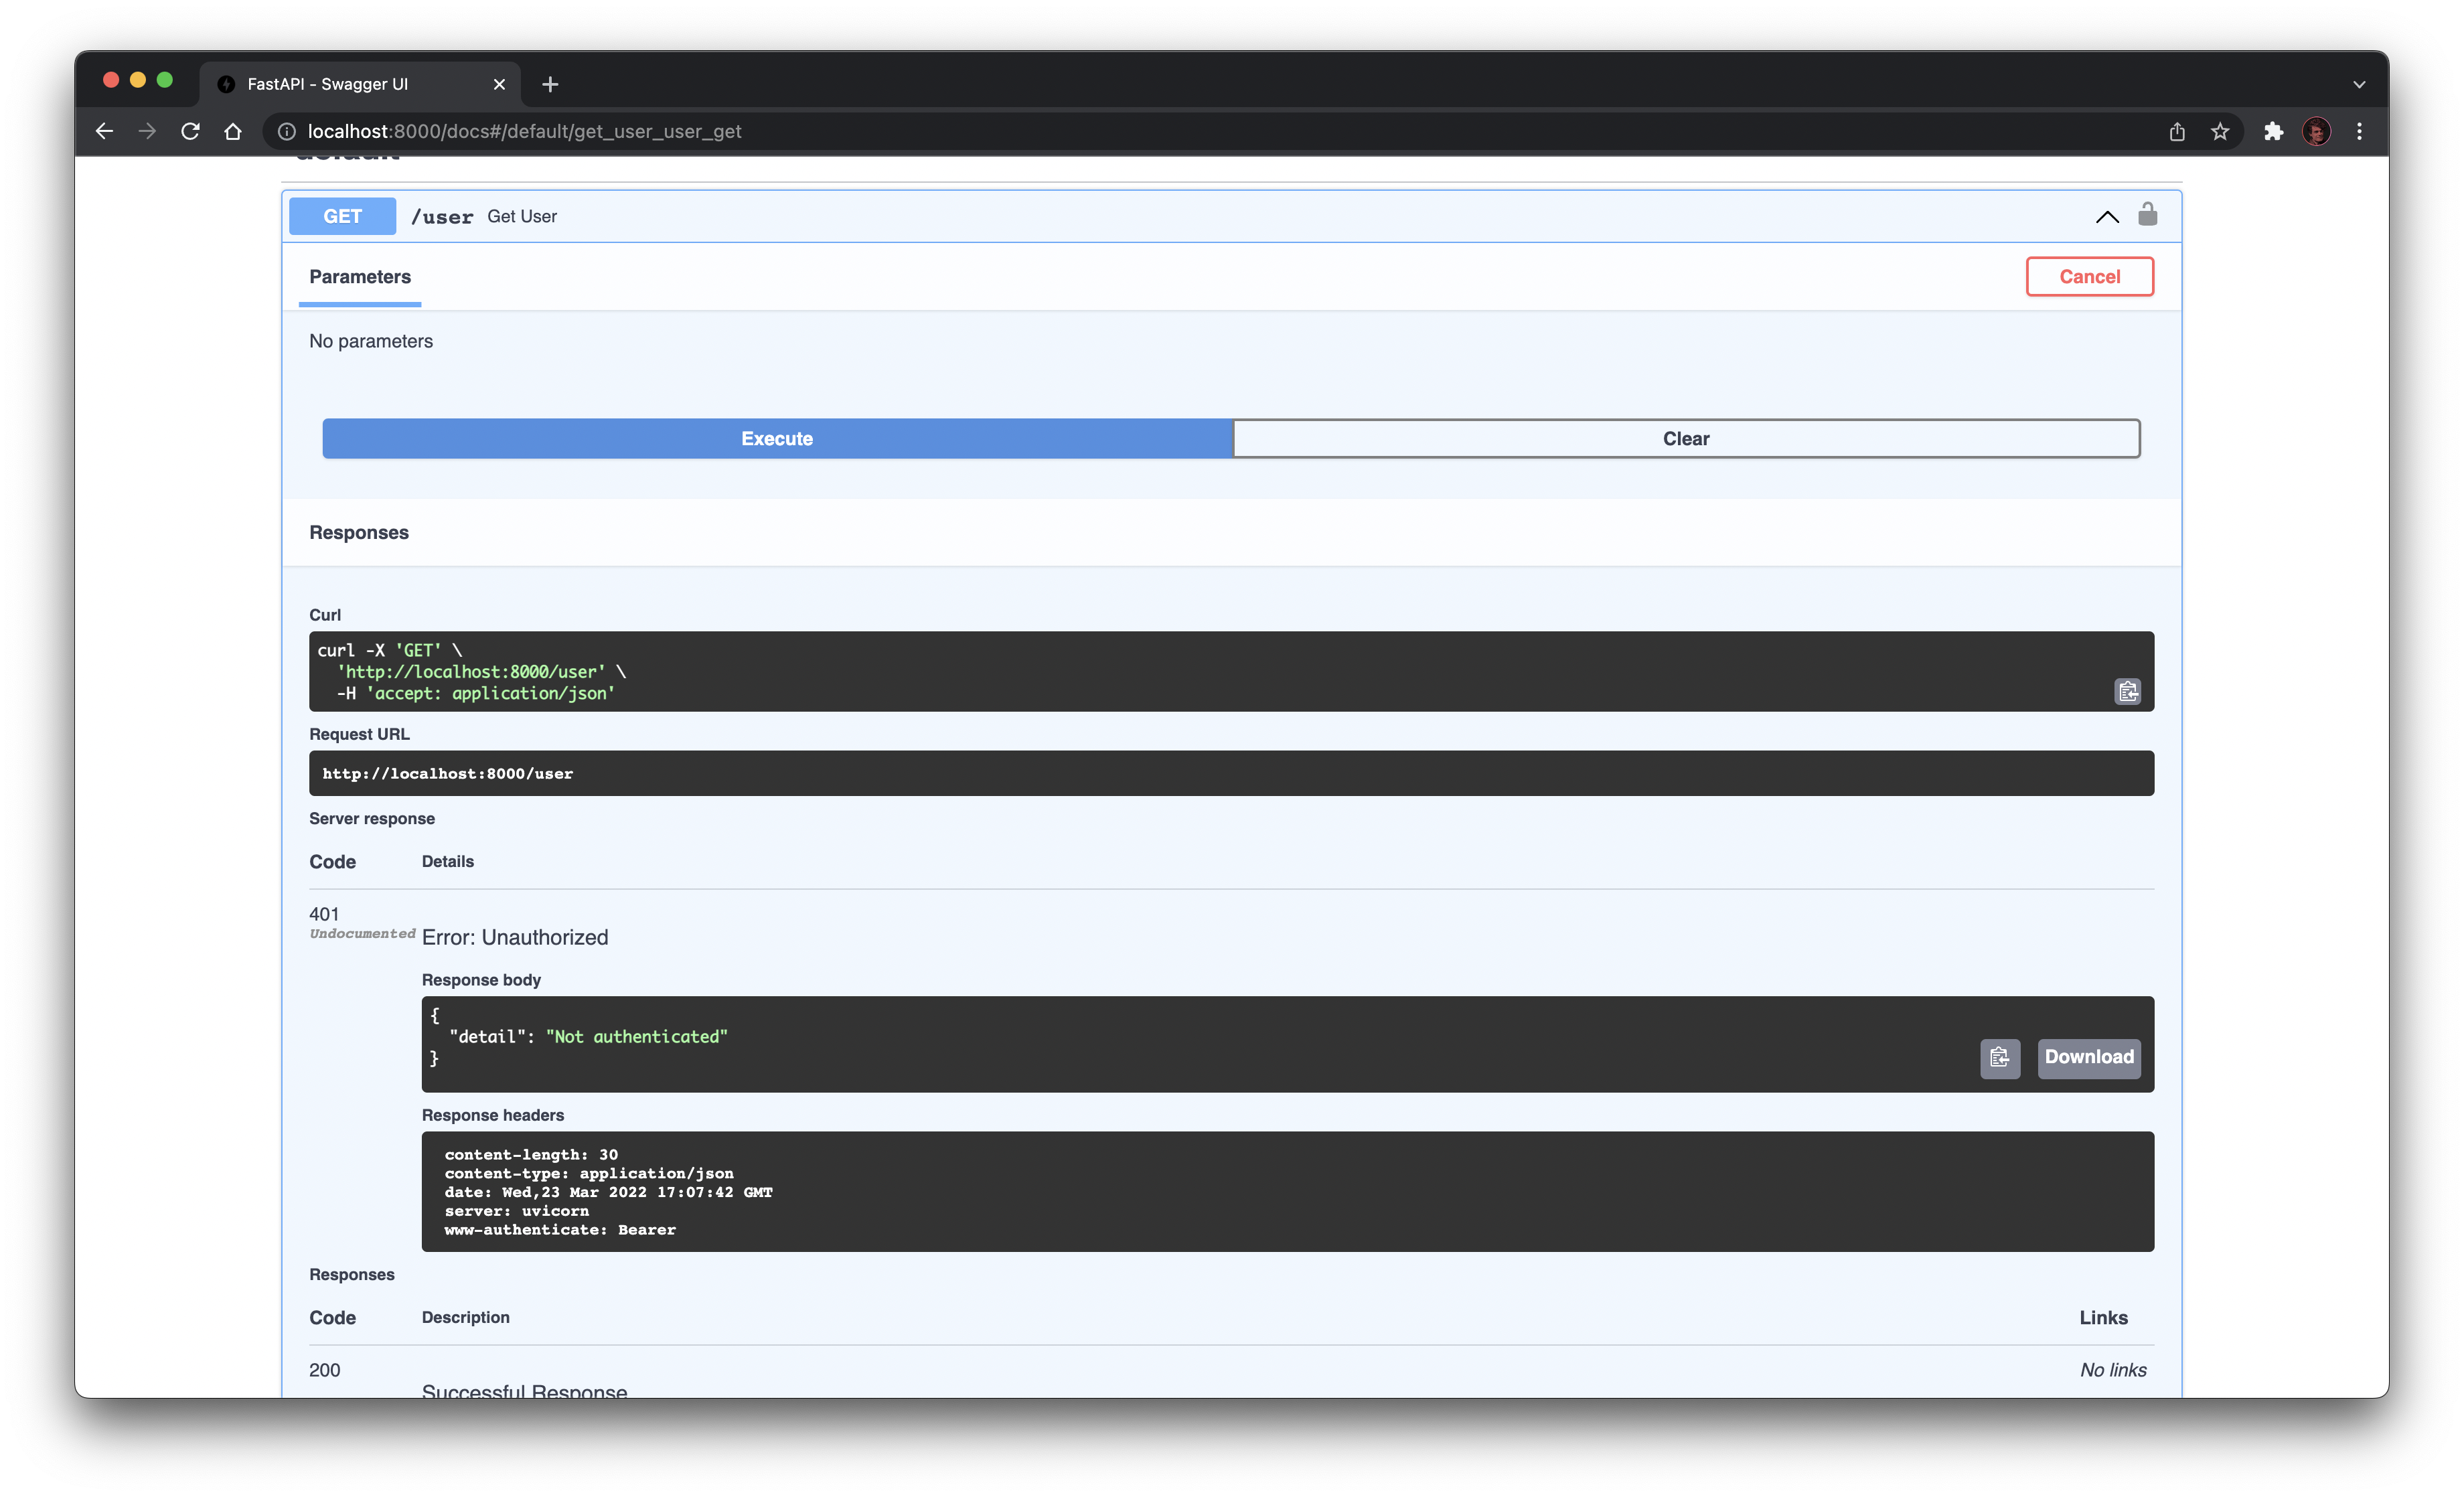
We get an 401 error! That's expected: we are not authenticated yet!
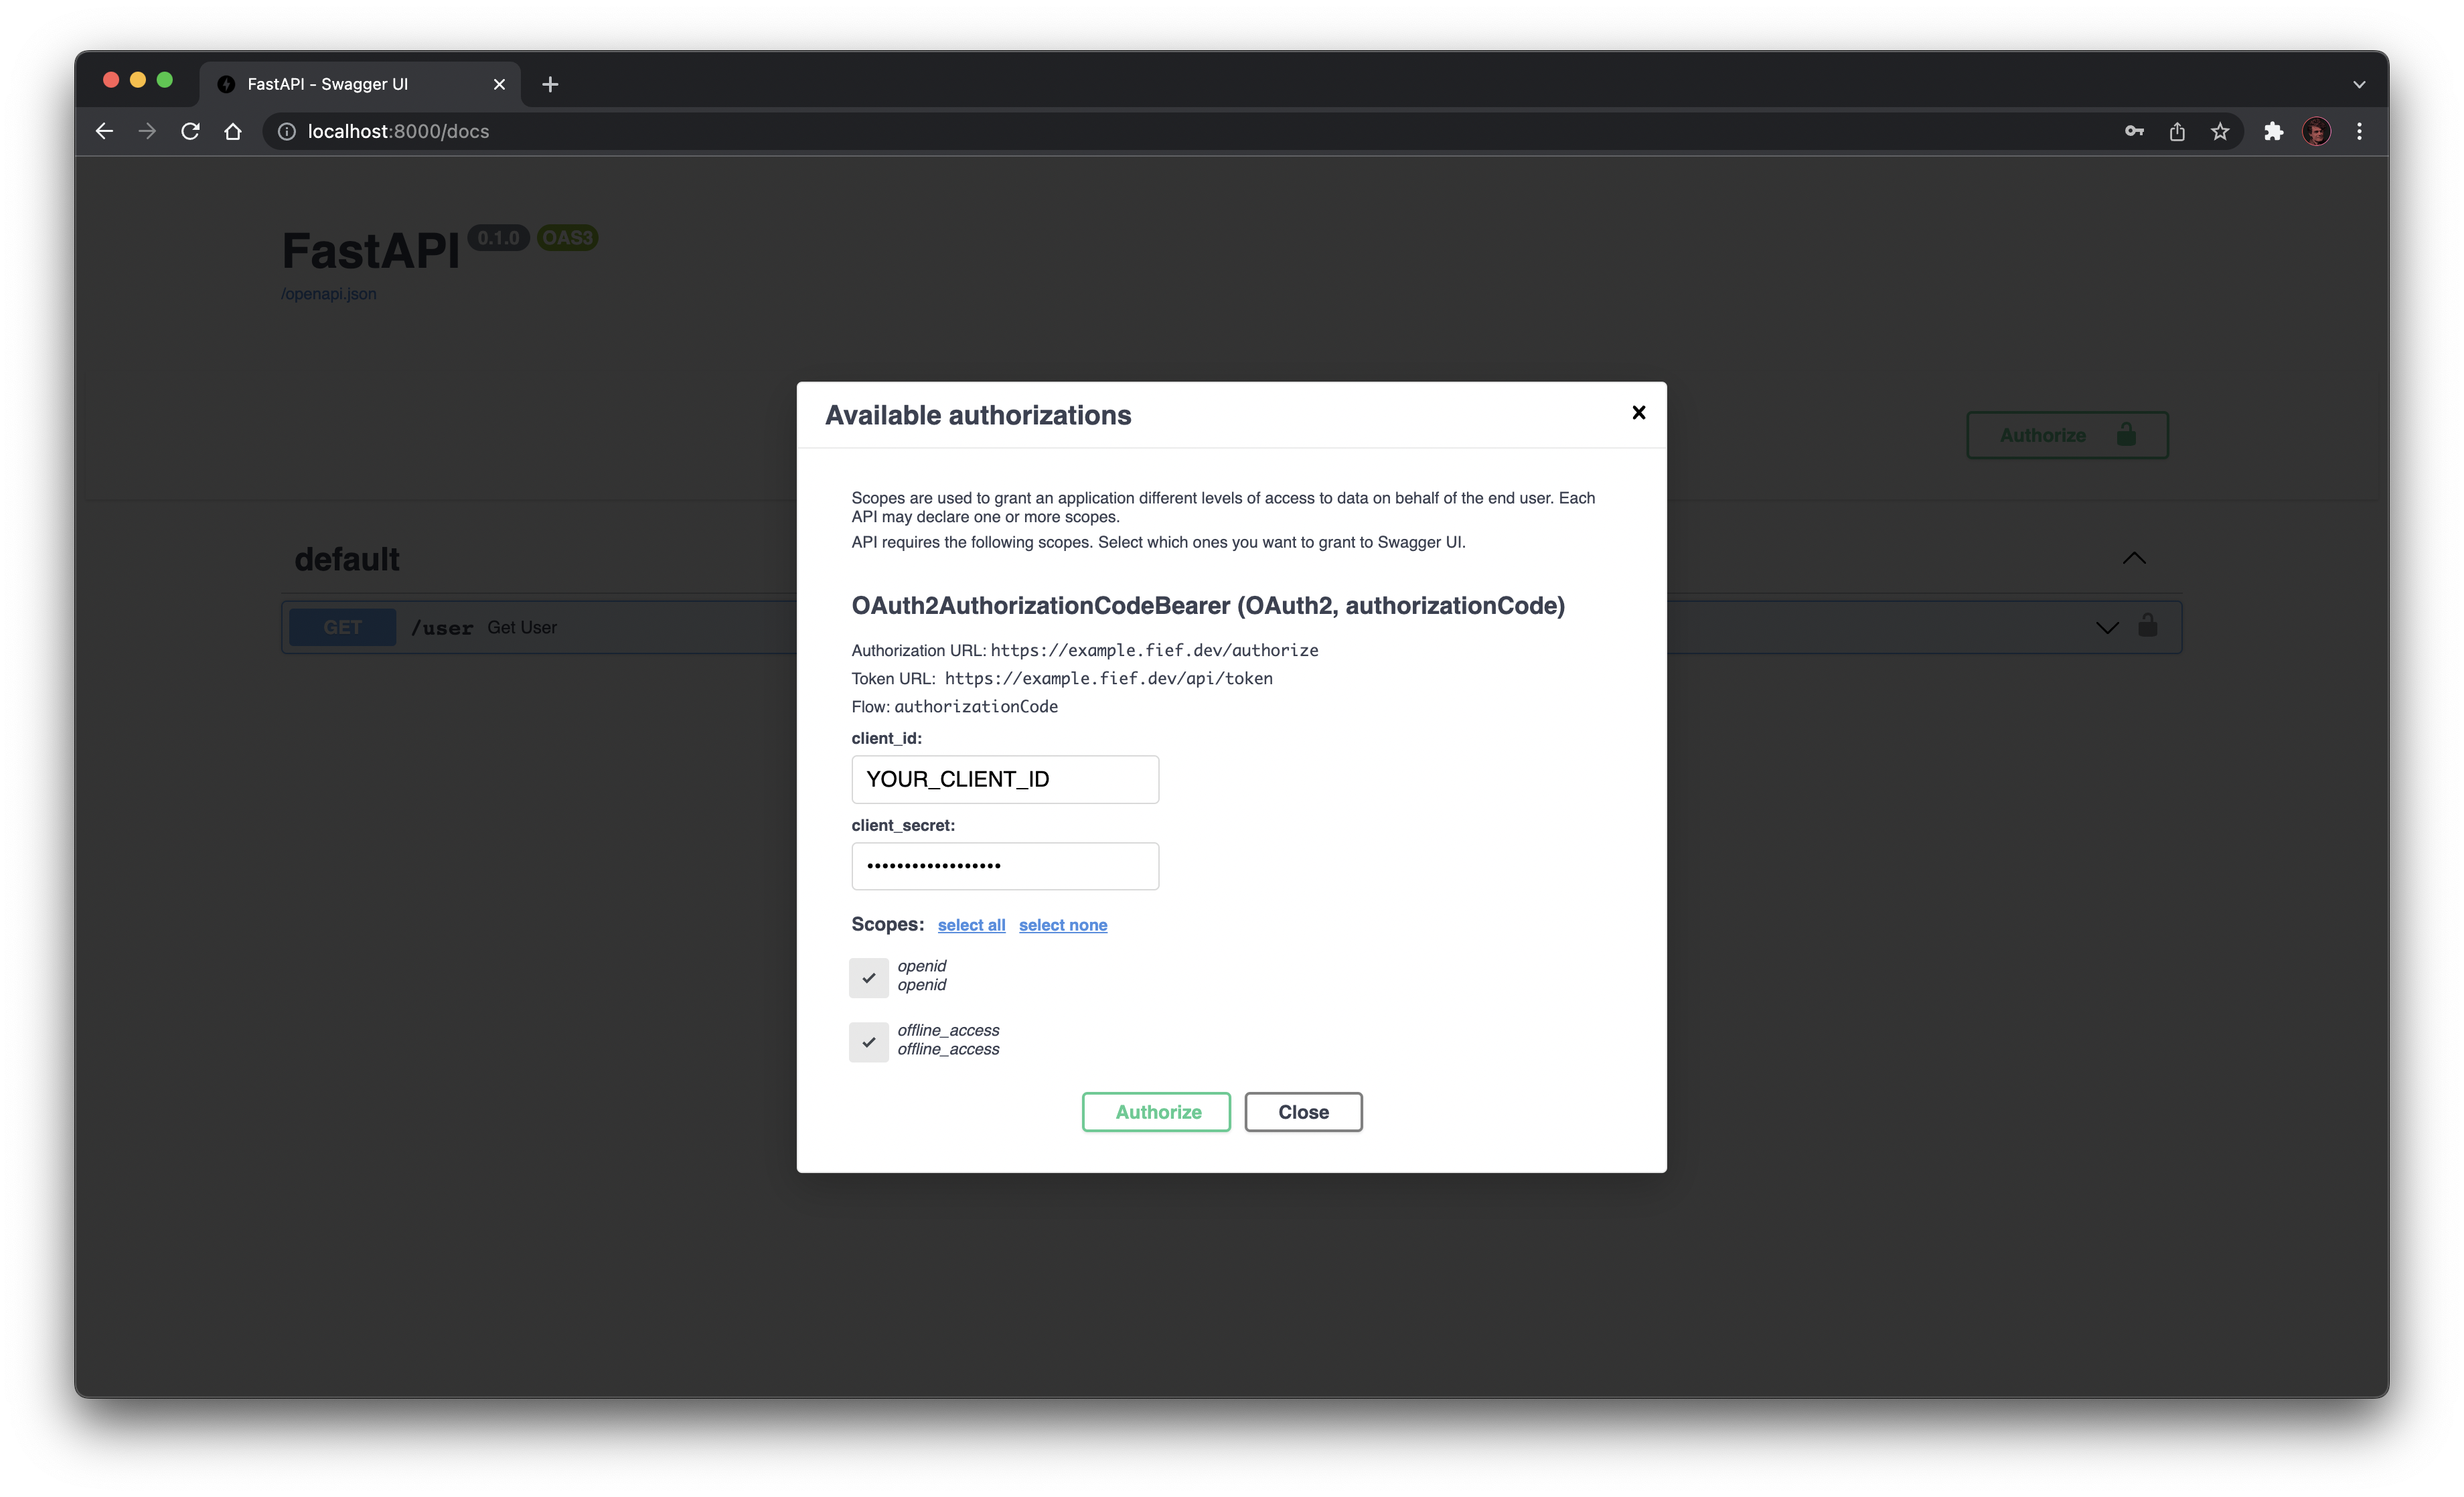
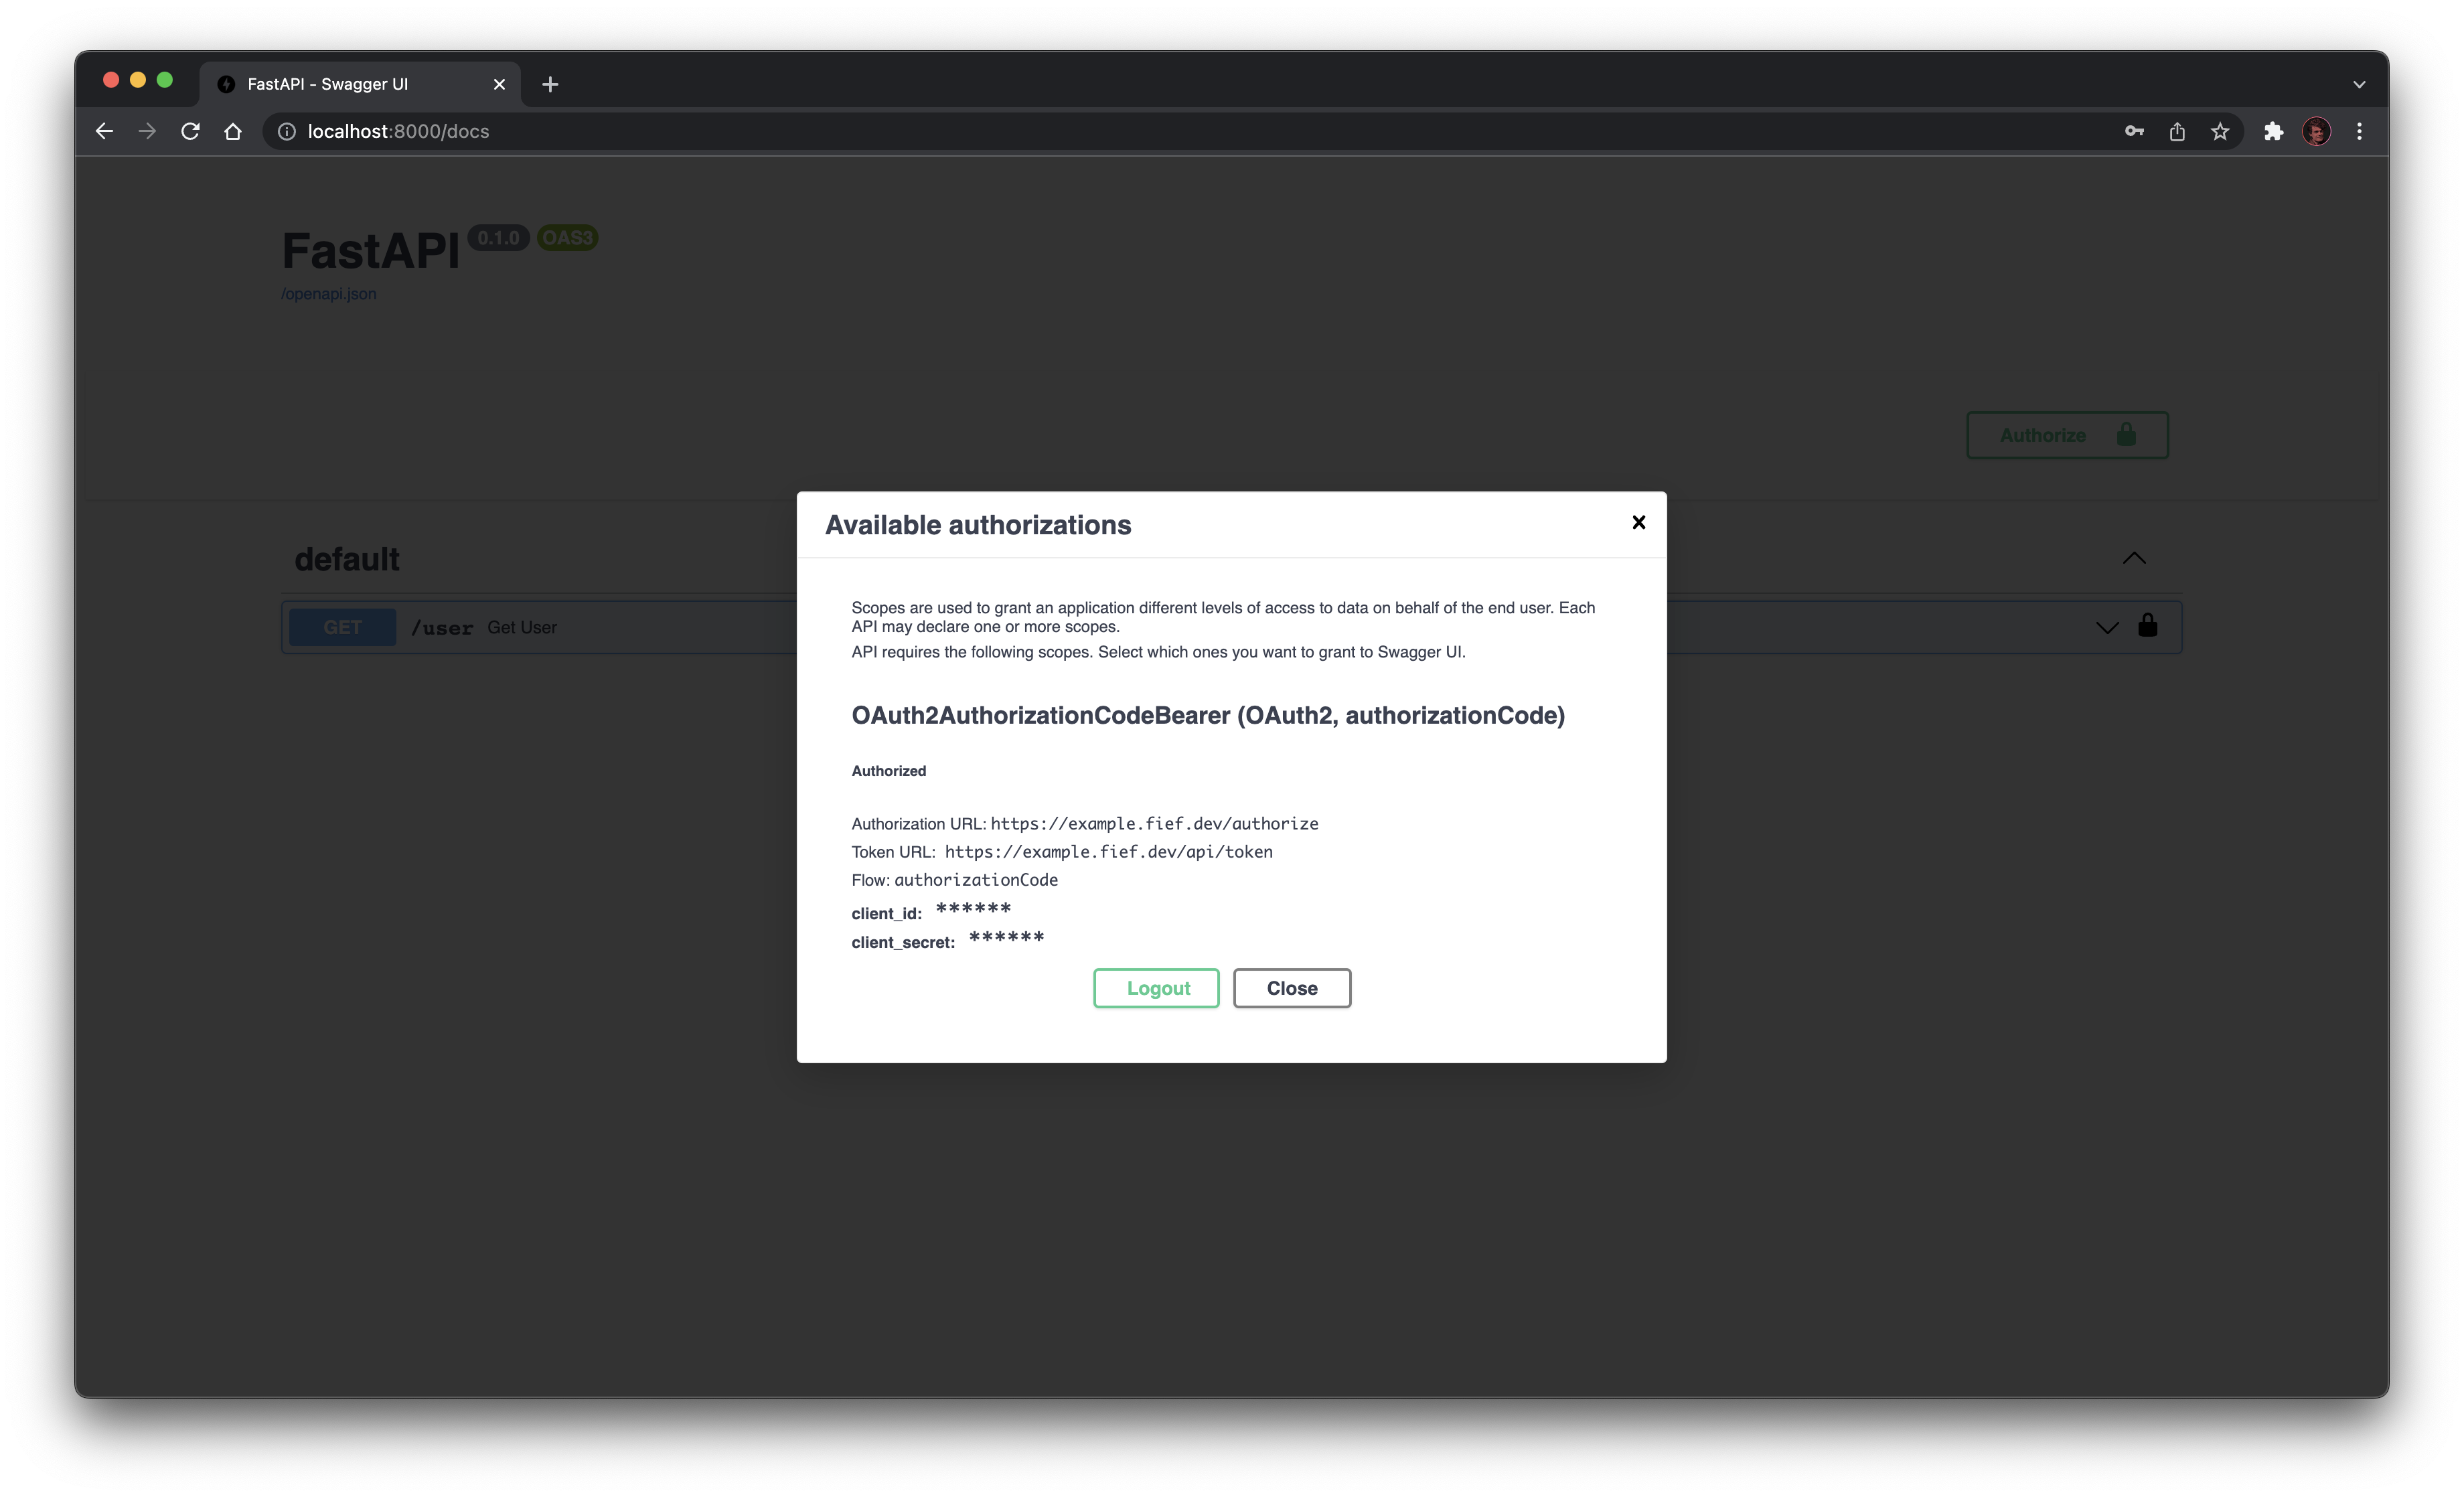
Let's fix that: click on the Authorize button to start the authentication process. You'll need to provide your client ID and secret and select the scopes.
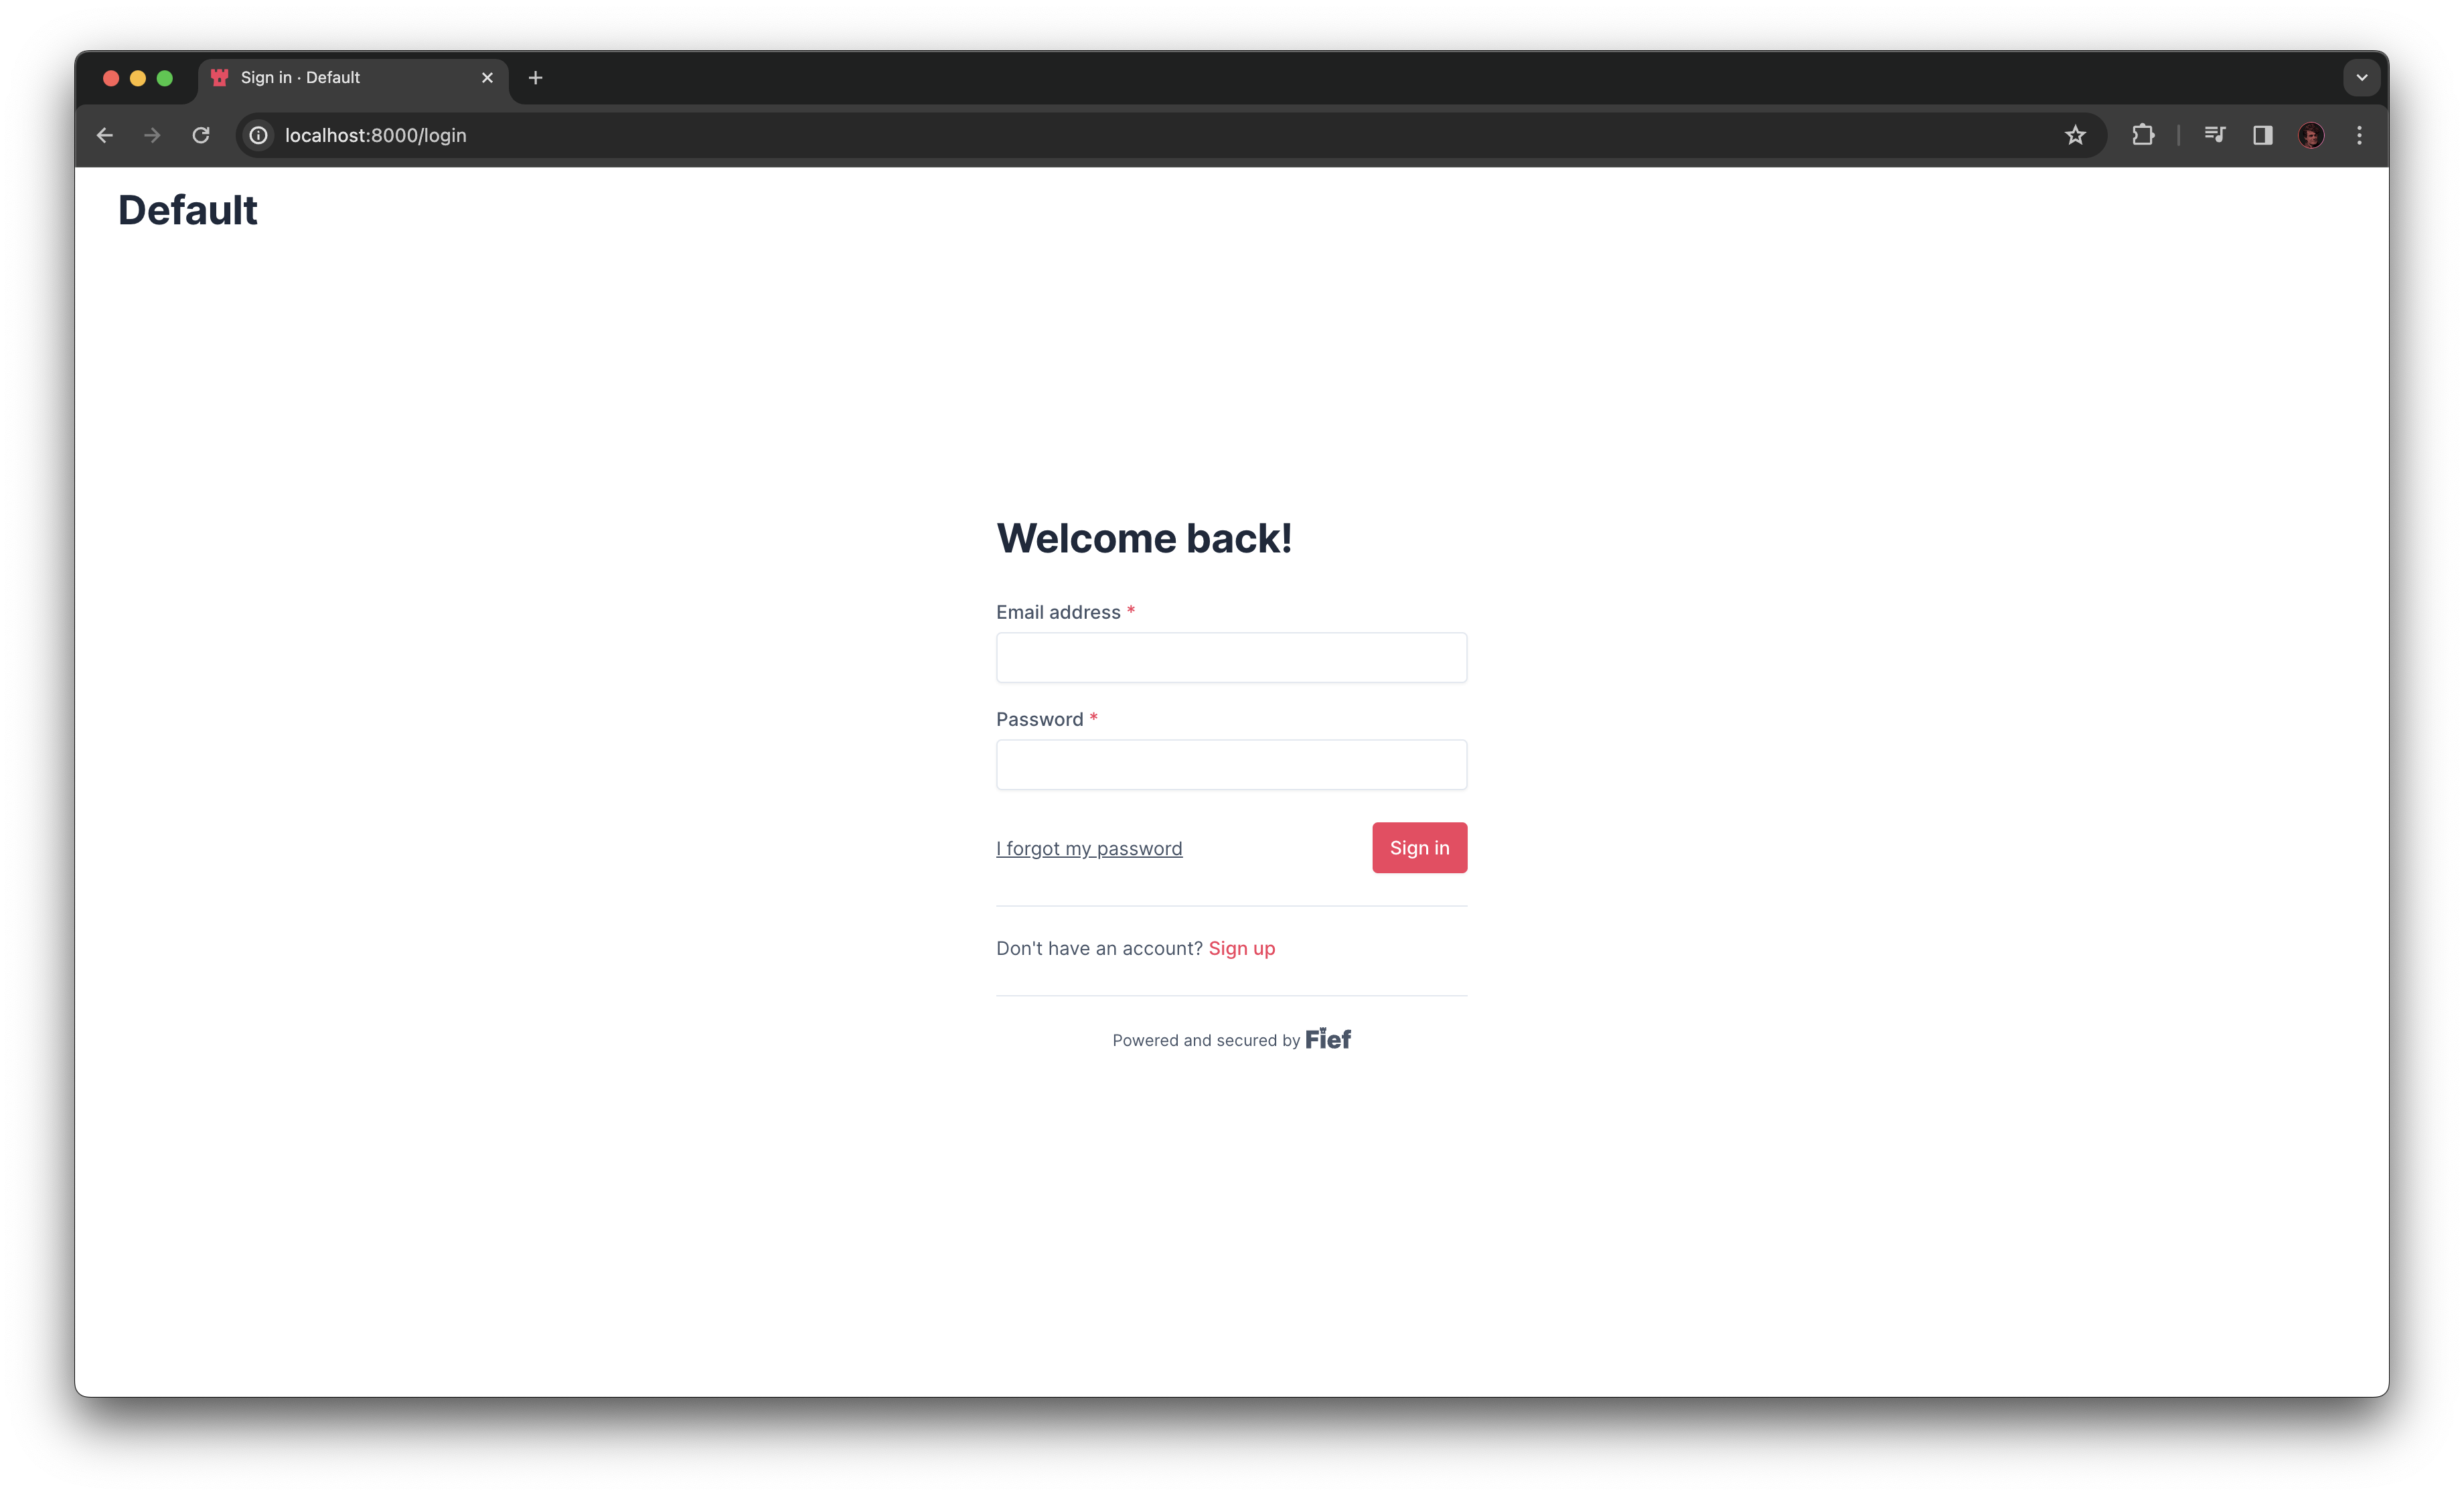
Click on the Authorize button: you are redirected to the Fief login page.
Upon successful login, you will be redirected back to the interactive documentation: a valid access token has been generated!
You can now try the /user endpoint to check the result:
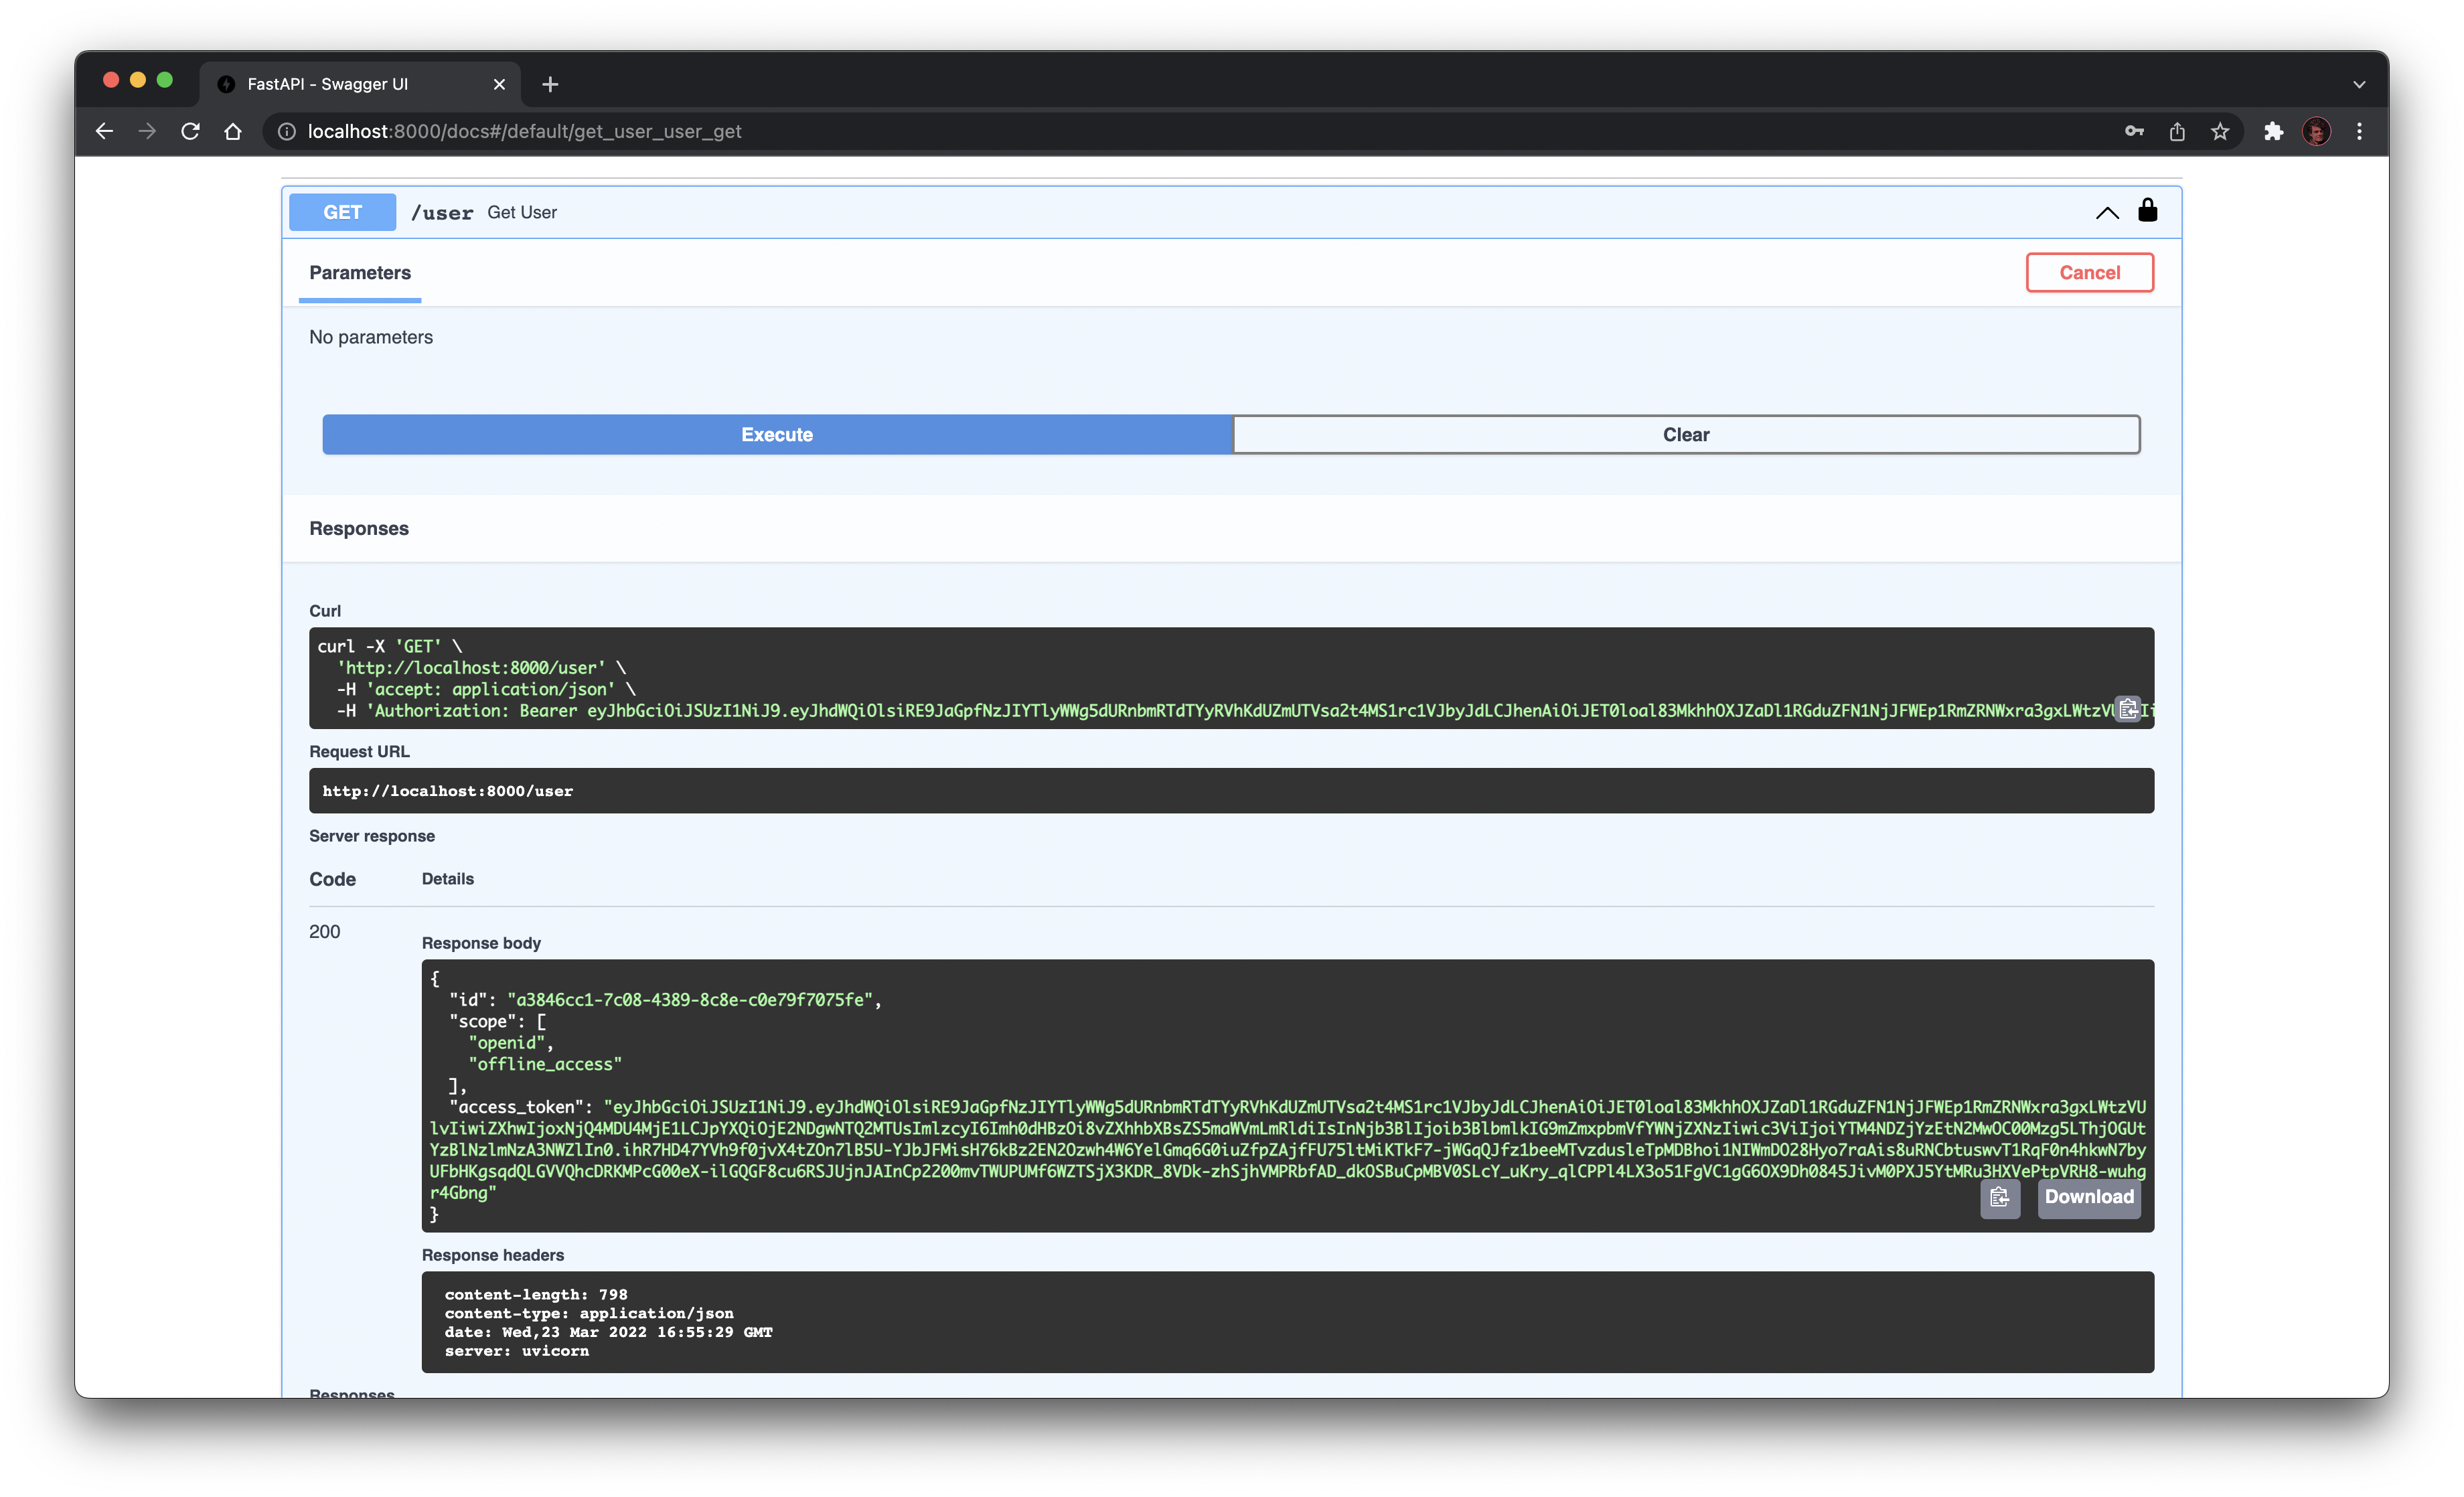
Notice how the interactive documentation passed the access token in the Authorization header of the request!
Besides, the response does contain the user ID, the list of allowed scopes and the access token itself.
Checking for scopes
Building on the previous example, you can make your endpoint require the access token to be granted a list of scopes. Simply add this list of scopes as a keyword parameter of the authenticated dependency.
from fastapi import Depends, FastAPI
from fastapi.security import OAuth2AuthorizationCodeBearer
from fief_client import FiefAccessTokenInfo, FiefAsync
from fief_client.integrations.fastapi import FiefAuth

fief = FiefAsync(
    "https://fief.mydomain.com",
    "YOUR_CLIENT_ID",
    "YOUR_CLIENT_SECRET",
)

scheme = OAuth2AuthorizationCodeBearer(
    "https://fief.mydomain.com/authorize",
    "https://fief.mydomain.com/api/token",
    scopes={"openid": "openid", "offline_access": "offline_access"},
    auto_error=False,
)

auth = FiefAuth(fief, scheme)

app = FastAPI()


@app.get("/user")
async def get_user(
    access_token_info: FiefAccessTokenInfo = Depends(
        auth.authenticated(scope=["openid", "required_scope"])
    ),
):
    return access_token_info
If one of the required scope is missing on the access token, a 403 Forbidden error will automatically be returned.
Checking for permissions
Similary, you can make your endpoint require the user to be granted a list of permissions. Simply add this list of permissions as a keyword parameter of the authenticated dependency.
from fastapi import Depends, FastAPI
from fastapi.security import OAuth2AuthorizationCodeBearer
from fief_client import FiefAccessTokenInfo, FiefAsync
from fief_client.integrations.fastapi import FiefAuth

fief = FiefAsync(
    "https://fief.mydomain.com",
    "YOUR_CLIENT_ID",
    "YOUR_CLIENT_SECRET",
)

scheme = OAuth2AuthorizationCodeBearer(
    "https://fief.mydomain.com/authorize",
    "https://fief.mydomain.com/api/token",
    scopes={"openid": "openid", "offline_access": "offline_access"},
    auto_error=False,
)

auth = FiefAuth(fief, scheme)

app = FastAPI()


@app.get("/user")
async def get_user(
    access_token_info: FiefAccessTokenInfo = Depends(
        auth.authenticated(permissions=["castles:read"])
    ),
):
    return access_token_info
If one of the required permission is missing on ther user, a 403 Forbidden error will automatically be returned.
Optional user
Sometimes, you need to have a route retrieve the user if there is one authenticated, but still work if there is none. To do this, you can leverage the optional parameter of the authenticated dependency.
from typing import Optional

from fastapi import Depends, FastAPI
from fastapi.security import OAuth2AuthorizationCodeBearer
from fief_client import FiefAccessTokenInfo, FiefAsync
from fief_client.integrations.fastapi import FiefAuth

fief = FiefAsync(
    "https://fief.mydomain.com",
    "YOUR_CLIENT_ID",
    "YOUR_CLIENT_SECRET",
)

scheme = OAuth2AuthorizationCodeBearer(
    "https://fief.mydomain.com/authorize",
    "https://fief.mydomain.com/api/token",
    scopes={"openid": "openid", "offline_access": "offline_access"},
    auto_error=False,
)

auth = FiefAuth(fief, scheme)

app = FastAPI()


@app.get("/optional-user")
async def get_optional_user(
    access_token_info: Optional[FiefAccessTokenInfo] = Depends(
        auth.authenticated(optional=True)
    ),
):
    if access_token_info is None:
        return {"message": "Anonymous user"}
    return access_token_info
Web application example
This is for you if...
- Your FastAPI backend will render HTML pages.
- Your application is intended to be used in a browser.
Prerequisites
- Allow the following Redirect URI on your Fief Client:
http://localhost:8000/auth-callback
The examples we showed previously are working well in a pure REST API context: a frontend, like interactive documentation, a JavaScript application or a mobile app will take care of the OAuth2 authentication flow to retrieve an access token before making request to your API.
Another common context is traditional web application, where the server takes care of generating HTML pages before returning it to the browser. In this case, we'll need some routes to redirect the user to the Fief login page if they're not authenticated and take care of storing the access token somewhere. This is what'll show in this example.
Besides, we'll usually need the basic information about the authenticated user, like its email or the values of the custom user fields. We'll see how we can use it.
Basically, here's what we'll do:
- This time, we'll expect the access token to be passed through a traditional cookie instead of an HTTP header. Cookies are very convenient when designing web apps because they are handled automatically by the browser.
- If the cookie is not present, we'll redirect the user to the Fief login page. Once again, the browser will help us a lot here since it'll automatically follow the redirection.
- Upon successful login, Fief will automatically redirect the user to the callback route. This callback route will take care of setting a new cookie containing the access token. It means that the access token will be safely stored in the browser memory.
- Finally, the user is redirected back to the protected route. The browser will automatically send the cookie containing the access token: our request is now authenticated!
from fastapi import Depends, FastAPI, HTTPException, Query, Request, Response, status
from fastapi.responses import HTMLResponse, RedirectResponse
from fastapi.security import APIKeyCookie
from fief_client import FiefAsync, FiefUserInfo
from fief_client.integrations.fastapi import FiefAuth


class CustomFiefAuth(FiefAuth):  # (1)!
    client: FiefAsync

    async def get_unauthorized_response(self, request: Request, response: Response):
        redirect_uri = request.url_for("auth_callback")  # (2)!
        auth_url = await self.client.auth_url(redirect_uri, scope=["openid"])  # (3)!
        raise HTTPException(
            status_code=status.HTTP_307_TEMPORARY_REDIRECT,  # (4)!
            headers={"Location": str(auth_url)},
        )


fief = FiefAsync(  # (5)!
    "https://fief.mydomain.com",
    "YOUR_CLIENT_ID",
    "YOUR_CLIENT_SECRET",
)

SESSION_COOKIE_NAME = "user_session"
scheme = APIKeyCookie(name=SESSION_COOKIE_NAME, auto_error=False)  # (6)!
auth = CustomFiefAuth(fief, scheme)  # (7)!
app = FastAPI()


@app.get("/auth-callback", name="auth_callback")  # (8)!
async def auth_callback(request: Request, response: Response, code: str = Query(...)):
    redirect_uri = request.url_for("auth_callback")
    tokens, _ = await fief.auth_callback(code, redirect_uri)  # (9)!

    response = RedirectResponse(request.url_for("protected"))  # (10)!
    response.set_cookie(  # (11)!
        SESSION_COOKIE_NAME,
        tokens["access_token"],
        max_age=tokens["expires_in"],
        httponly=True,  # (12)!
        secure=False,  # ❌ Set this to `True` in production (13)!
    )

    return response


@app.get("/protected", name="protected")
async def protected(
    user: FiefUserInfo = Depends(auth.current_user()),  # (14)!
):
    return HTMLResponse(
        f"<h1>You are authenticated. Your user email is {user['email']}</h1>"
    )
-
We customize the
FiefAuthhelper to fit our needsThe base class is implemented with an API scenario in mind. Nevertheless, it's designed in a way you can customize its behavior when the user is not authenticated or has not the required scope.
That's what'll do with the
get_unauthorized_response. -
We build the redirect URL
This points to our
/auth-callbackroute that we define below. -
We generate an authorization URL on the Fief server
Thanks to the
auth_urlmethod on the Fief client, we can automatically generate the authorization URL on the Fief server. -
We build a redirect response
By setting a status code in the 3XX range, we tell the browser that it should redirect the user to another URL, specified in the
Locationheader.You can read more about HTTP redirections on the MDN documentation.
-
This doesn't change from the previous example
The
FiefAsyncclient is always at the heart of the integration 😉 -
We use a scheme expecting a cookie
Contrary to the previous examples, we expect the access token to be passed in a cookie. Thus, we use a dedicated scheme for that.
Notice that we set the name of this cookie through the
SESSION_COOKIE_NAMEconstant.Besides, we set the
auto_errorargument toFalse. It tells FastAPI user to bypass its built-in error response if the cookie is not present: we have our own logic to handle this. -
We use our custom
CustomFiefAuthclassOf course, now that we overloaded the behavior of this helper class, we shouldn't forget to actually use it!
-
We implement an
/auth-callbackrouteThis is the route that'll take care of exchanging the authorization code with a fresh access token and save it in a cookie.
Notice that we set its
nameparameter: this is how we can generate its URL automatically with therequest.url_formethod. -
We generate an access token
We finish the OAuth2 flow by exchanging the authorization code with a fresh access token.
-
We build a redirection to the
/protectedrouteThe user will now be correctly authenticated to our web application. Thus, we can redirect them to a protected page.
-
We build a new cookie containing the access token
The response will contain a
Set-Cookieheader instructing the browser to save the access token in its memory. This method allows us to configure each properties of the cookie.You can read more about HTTP cookies on the MDN documentation.
-
Set the cookie as
HTTPOnlyFor such sensitive values, it's strongly recommended to set the cookie as
HTTPOnly. It means that it won't be possible to read its value from JavaScript, reducing potential attacks. -
Set the cookie as secure in production
For such sensitive values, it's strongly recommended to set the cookie as
Secure. It tells the browser to send the cookie only on HTTPS (SSL) connection, reducing the risk of the access token to be stolen by a attacker between the client and the server.However, in a local environment, you usually don't serve your application with SSL. That's why we set it to
Falsein this example. A common approach to handle this is to have an environment variable to control this parameter, so you can disable it in local and enable it in production. -
Use the
current_userdependencyThis time, we use the
current_userdependency instead ofauthenticated. Under the hood, it'll stil callauthenticatedand check if the cookie is available in the request and proceed if everything goes well. However, it'll return you aFiefUserInfodictionary containing the data of the user.If the request is not authenticated, our custom
get_unauthorized_responsewill be called and the user will be redirected to the Fief login page.
That's it! If you run this application and go to http://localhost:8000/protected, you'll be redirected to the Fief login page and experience the authentication flow before getting back to this route with a proper authentication cookie.
Read the next example for a more optimal implementation
In this example, the user information is not cached. For the performance of your application, we highly recommend you to read the next example.
current_user can also check for scope and permissions
In a similar way as we shown in the API example, you can also require the access token to be granted a list of scopes or the user to be granted a list of permissions.
You can also optionally require the user
In a similar way as we shown in the API example, you can leverage the optional parameter to make the route work even if no user is authenticated.
@app.get("/protected", name="protected")
async def protected(
    user: Optional[FiefUserInfo] = Depends(auth.current_user(optional=True)),
):
    if user is None:
        return HTMLResponse(
            f"<h1>You are an anonymous user.</h1>"
        )
    return HTMLResponse(
        f"<h1>You are authenticated. Your user email is {user['email']}</h1>"
    )
Caching user information
In the previous example, we didn't set up cache for the user information. It means that everytime we hit the /protected route, the Fief API will be called to get the data. Obviously, this is not very optimal.
Let's fix this! Fortunately, the client provides you useful tools to help you with this. Building upon the previous example, let's see how we can cache user information.
import uuid
from typing import Dict, Optional

from fastapi import Depends, FastAPI, HTTPException, Query, Request, Response, status
from fastapi.responses import HTMLResponse, RedirectResponse
from fastapi.security import APIKeyCookie
from fief_client import FiefAsync, FiefUserInfo
from fief_client.integrations.fastapi import FiefAuth


class CustomFiefAuth(FiefAuth):
    client: FiefAsync

    async def get_unauthorized_response(self, request: Request, response: Response):
        redirect_uri = request.url_for("auth_callback")
        auth_url = await self.client.auth_url(redirect_uri, scope=["openid"])
        raise HTTPException(
            status_code=status.HTTP_307_TEMPORARY_REDIRECT,
            headers={"Location": str(auth_url)},
        )


class MemoryUserInfoCache:  # (1)!
    def __init__(self) -> None:
        self.storage: Dict[uuid.UUID, FiefUserInfo] = {}  # (2)!

    async def get(self, user_id: uuid.UUID) -> Optional[FiefUserInfo]:  # (3)!
        return self.storage.get(user_id)

    async def set(self, user_id: uuid.UUID, userinfo: FiefUserInfo) -> None:  # (4)!
        self.storage[user_id] = userinfo


memory_userinfo_cache = MemoryUserInfoCache()  # (5)!


async def get_memory_userinfo_cache() -> MemoryUserInfoCache:  # (6)!
    return memory_userinfo_cache


fief = FiefAsync(
    "https://fief.mydomain.com",
    "YOUR_CLIENT_ID",
    "YOUR_CLIENT_SECRET",
)

SESSION_COOKIE_NAME = "user_session"
scheme = APIKeyCookie(name=SESSION_COOKIE_NAME, auto_error=False)
auth = CustomFiefAuth(
    fief,
    scheme,
    get_userinfo_cache=get_memory_userinfo_cache,  # (7)!
)
app = FastAPI()


@app.get("/auth-callback", name="auth_callback")
async def auth_callback(
    request: Request,
    response: Response,
    code: str = Query(...),
    memory_userinfo_cache: MemoryUserInfoCache = Depends(  # (8)!
        get_memory_userinfo_cache
    ),
):
    redirect_uri = request.url_for("auth_callback")
    tokens, userinfo = await fief.auth_callback(code, redirect_uri)

    response = RedirectResponse(request.url_for("protected"))
    response.set_cookie(
        SESSION_COOKIE_NAME,
        tokens["access_token"],
        max_age=tokens["expires_in"],
        httponly=True,
        secure=False,
    )

    await memory_userinfo_cache.set(uuid.UUID(userinfo["sub"]), userinfo)  # (9)!

    return response


@app.get("/protected", name="protected")
async def protected(
    user: FiefUserInfo = Depends(auth.current_user()),  # (10)!
):
    return HTMLResponse(
        f"<h1>You are authenticated. Your user email is {user['email']}</h1>"
    )
-
We start by implementing an helper class to store the user information somewhere
The implementation is completely up-to-you and could be something rather complex, like using a Redis server to cache this information.
We'll see that it expects you to implement two methods for working correctly with
FiefAuth. -
We store the data in memory using a dictionary
This is a very simple approach that will just store the data in memory. If your server is rebooted, the cache will be lost.
It can work quite well when starting, but you'll probably need more robust approaches in the long run, like writing to a Redis store. The good thing is that you'll only need to change this class when the time comes!
-
We implement the
.getmethodThis is the first compulsory method you have to implement in the class. It accepts an user ID as argument and expects you to return a cached
FiefUserInfodictionary orNoneif not available.Here, we simply read from our dictionary.
-
We implement the
.setmethodThis is the second and last compulsory method you have to implement in the class. It accepts an user ID and a
FiefUserInfodictionary as arguments. There, you'll need to store this data in cache.Here, we simply set the user information into our dictionary.
-
We instantiate
MemoryUserInfoCachegloballyIn order to have a global memory cache, we instantiate our class in the global context, at the same time of our FastAPI app.
This way, the dictionary will be initialized at the same time our app is launched.
Depending on your implementation, this may not be needed. We could also imagine to have a fresh instance every time we use it. This is typically the case when using database sessions for example.
-
We define a callable dependency to get our class
This pattern is typical of FastAPI. With a callable dependency, we are able to tell FastAPI to automatically instantiate objects, potentially needing other sub-dependencies as well.
This is especially handy if you already have a dependency taking care of returning you a database connection or a session object for example.
In our example here, we don't have any complex dependency, so we can just directly return the
memory_userinfo_cacheinstance. -
We add the
get_userinfo_cacheargument toCustomFiefAuthThis is an optional keyword argument that basically tells
FiefAuthto use the caching class returned byget_userinfo_cachewhen you want to get the user information.That's why it's important to strictly follow the methods signature presented above:
FiefAuthwill call them inside its logic. -
We add
memory_userinfo_cacheas a dependency toauth_callbackWhen a user has successfully authenticated, we do not only get the access token: we also get an ID token which already contains the user information.
Hence, we'll take this opportunity to store it in our cache!
Since we defined it as a callable dependency, we can directly use
get_memory_userinfo_cacheinside our route to use it. -
We cache the user information
The ID token is automatically decoded by
fief.auth_callbackmethod.Thus, we just have to use our cache to store it!
-
The
current_userdependency doesn't changeNothing changes here! Now that we have set a
get_userinfo_cachedependency,current_userwill automatically use it to return you the user information.If it's not present in cache, it'll hit the Fief API.
Note that you can use
auth.current_user(refresh=True)if you need to always retrieve fresh data from the Fief API.
That's it! Now, we won't retrieve user information from the Fief API at each request. Typically, we'll set it in cache when the user authenticates and it'll be used during the lifetime of the session.